Before Configuration
- Please make sure there is a stable wifi connection and you have the correct wifi password.
- Please note that wifi with a firewall and mobile data internet connection is not suitable for our smart home system.
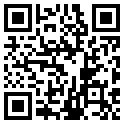
- If you plan to mount Smart Gateway with Camera on the ceiling, it is advisable to configure the gateway in i-TimeTec App first before mounting it, as you will need to scan the QR code sticker on the device during the configuration process.
- If you entered the wrong wifi password, you will have to reset the smart gateway by resetting it (poke the pinhole at the side of the gateway for 5-10 seconds until you hear.
Connect Device
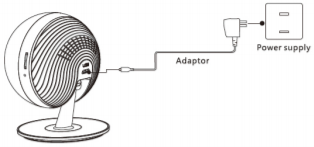
Power up: Connect camera to power supply with adaptor.
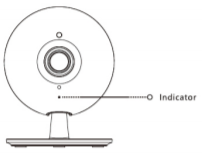
Once get power, indicator will turn on, and comes with voice prompt "initialize success, please configure WIFI".
=
Register Account In i-TimeTec App
To start using i-TimeTec App, you will need to register an user account.
|
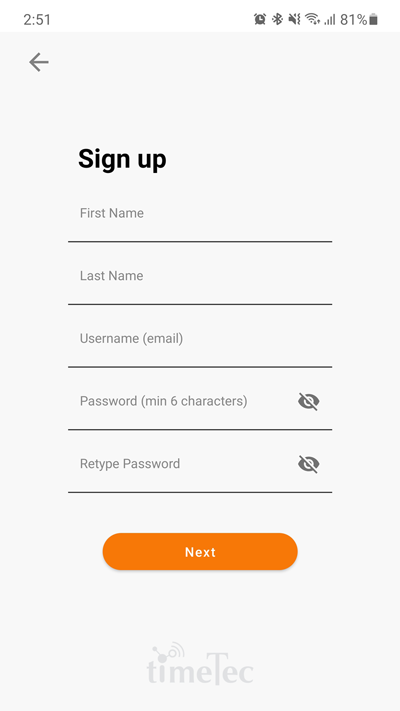
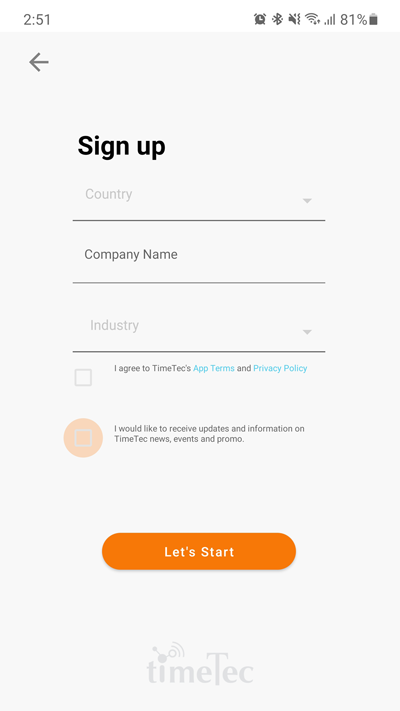
| 1. Click “sign up” to register for a new user account. |
|
| 2. Fill up all the fields and tap “next” |
|
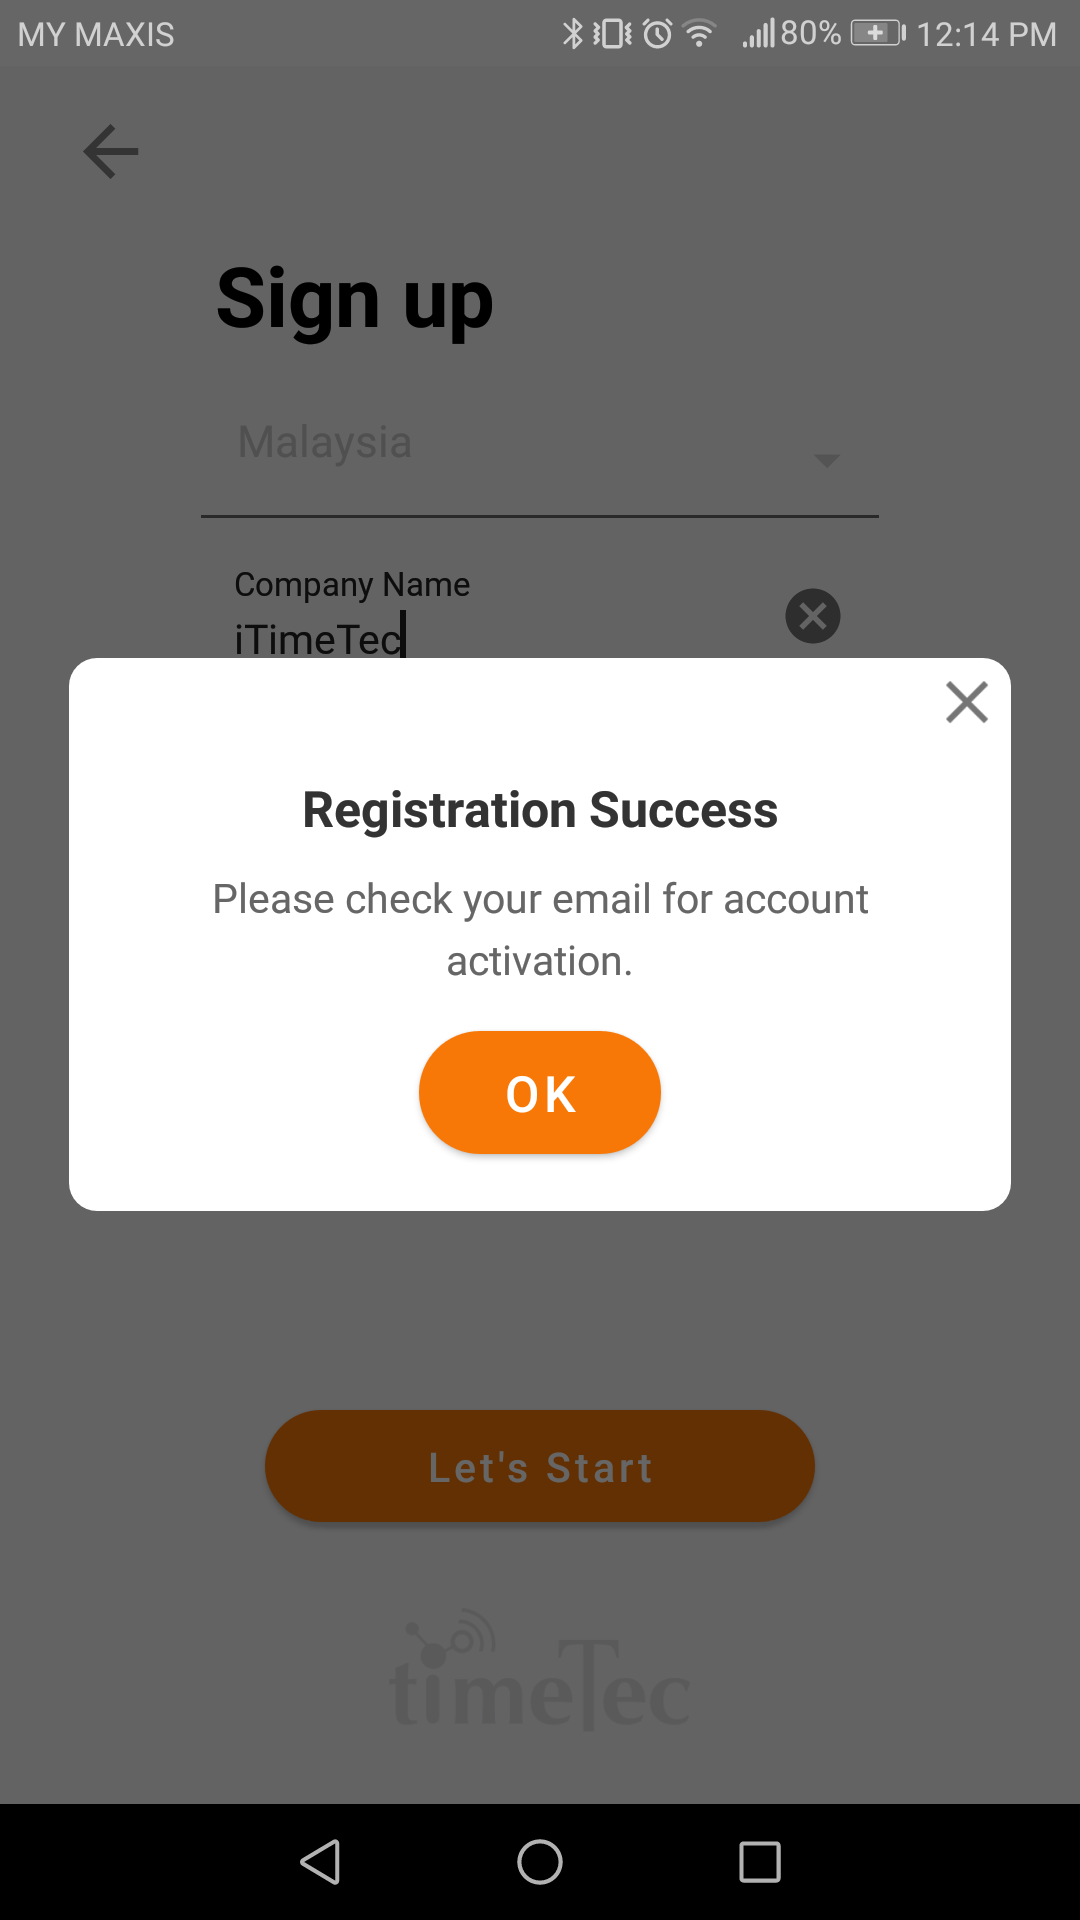
| 3. Fill up all the fields and tap ‘Let’s start’ |
|
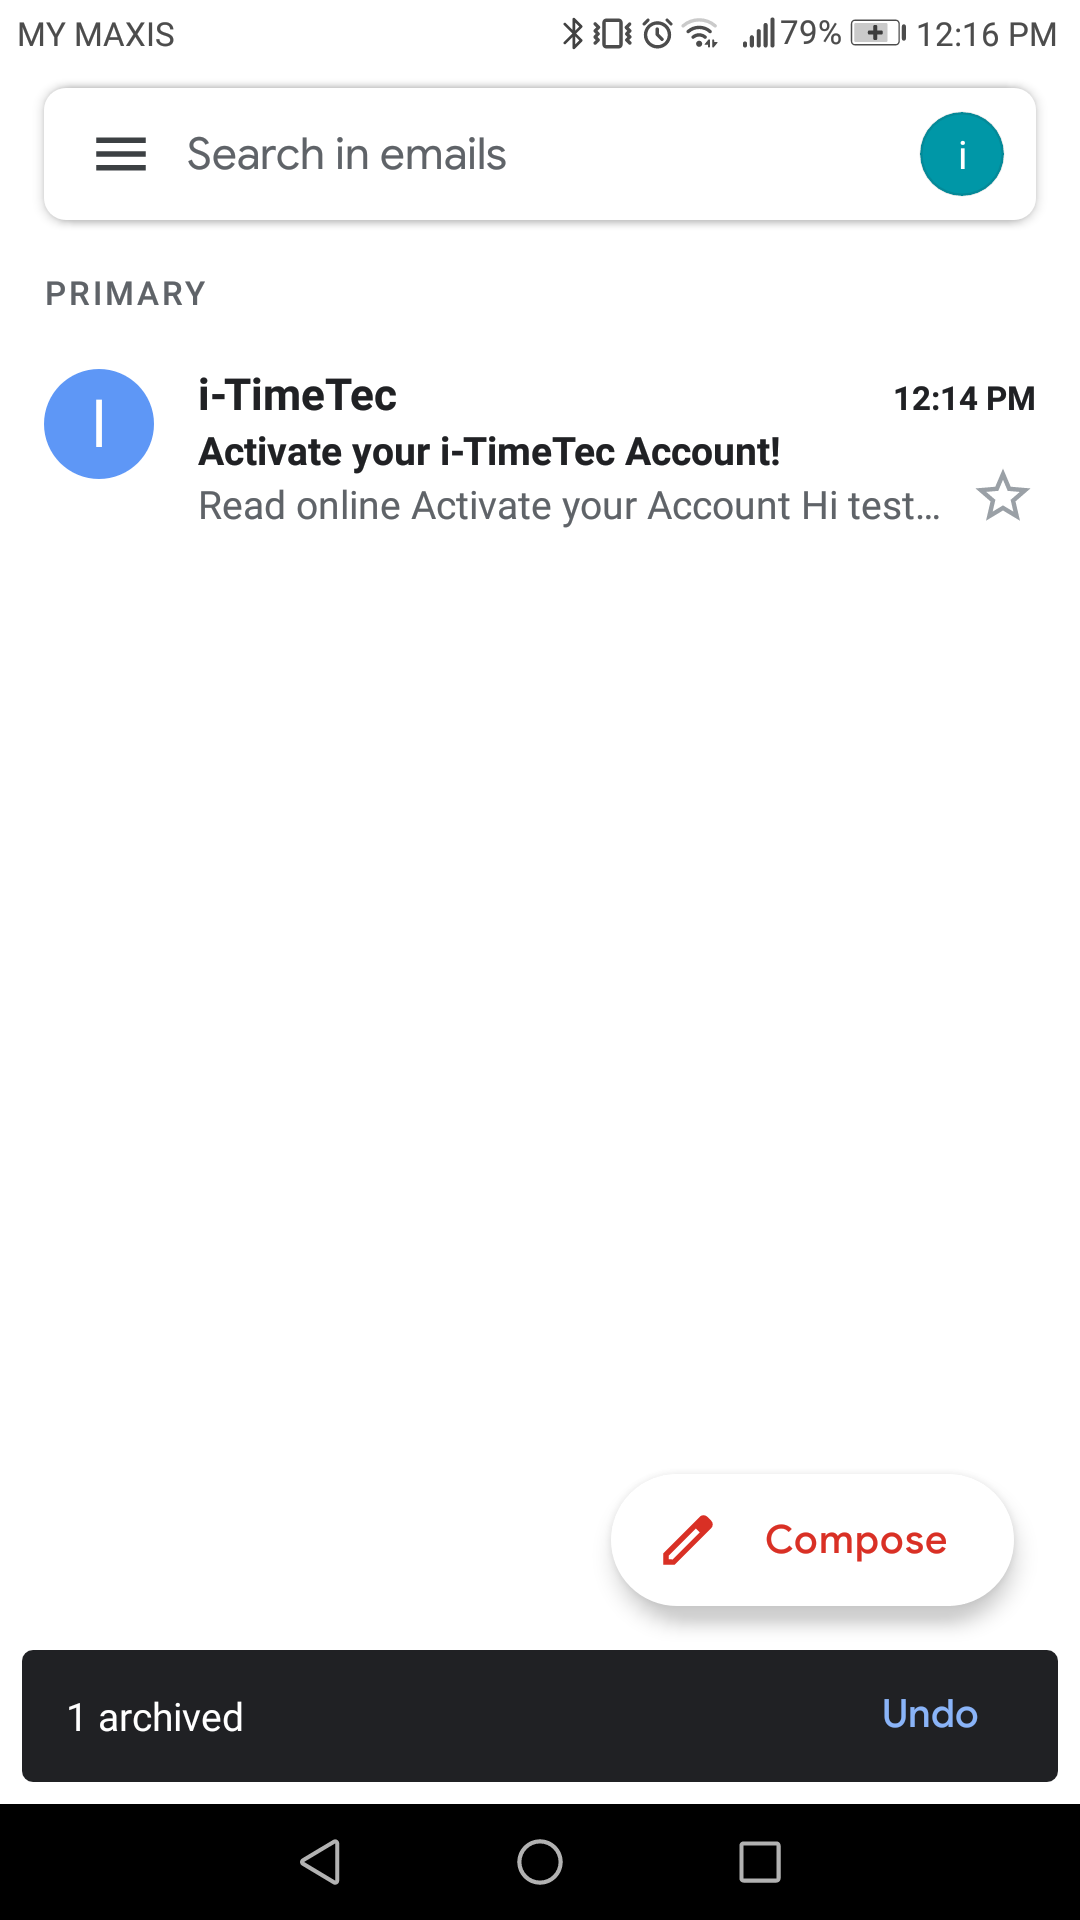
| 4. After signing up, you will receive an activation email. Tap “OK”. |
|
| 5. You will find this activation email in your inbox, if it is not there, you may try to look for it in the ‘spam’ folder, remember to mark it as “Not Spam”. |
|
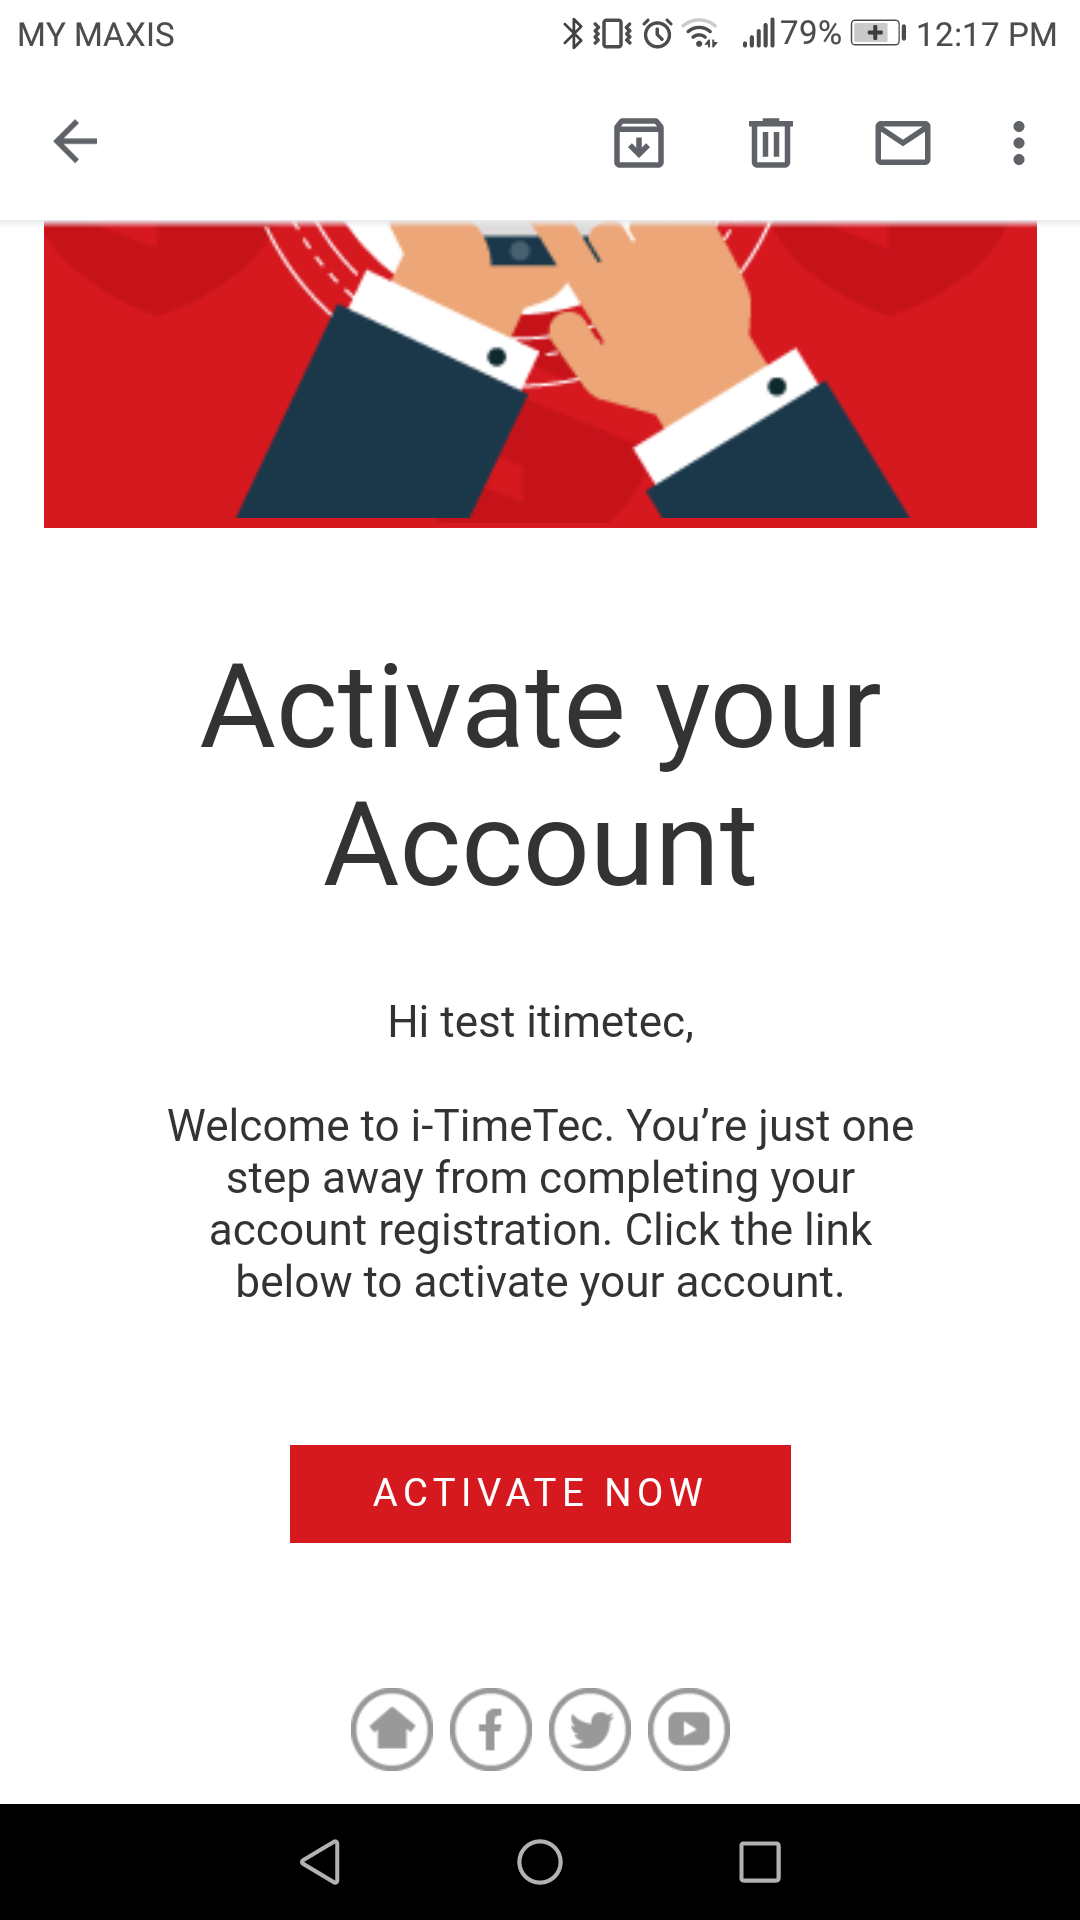
| 6. Open that email and click “Activate Now”. You will be led to the i-TimeTec website to understand more about our products. However, please proceed to open your i-TimeTec mobile app to continue setting up. |
|
| 7. When you log in i-TimeTec App for the first time, you will need to key in pairing code for authentication purposes. |
|
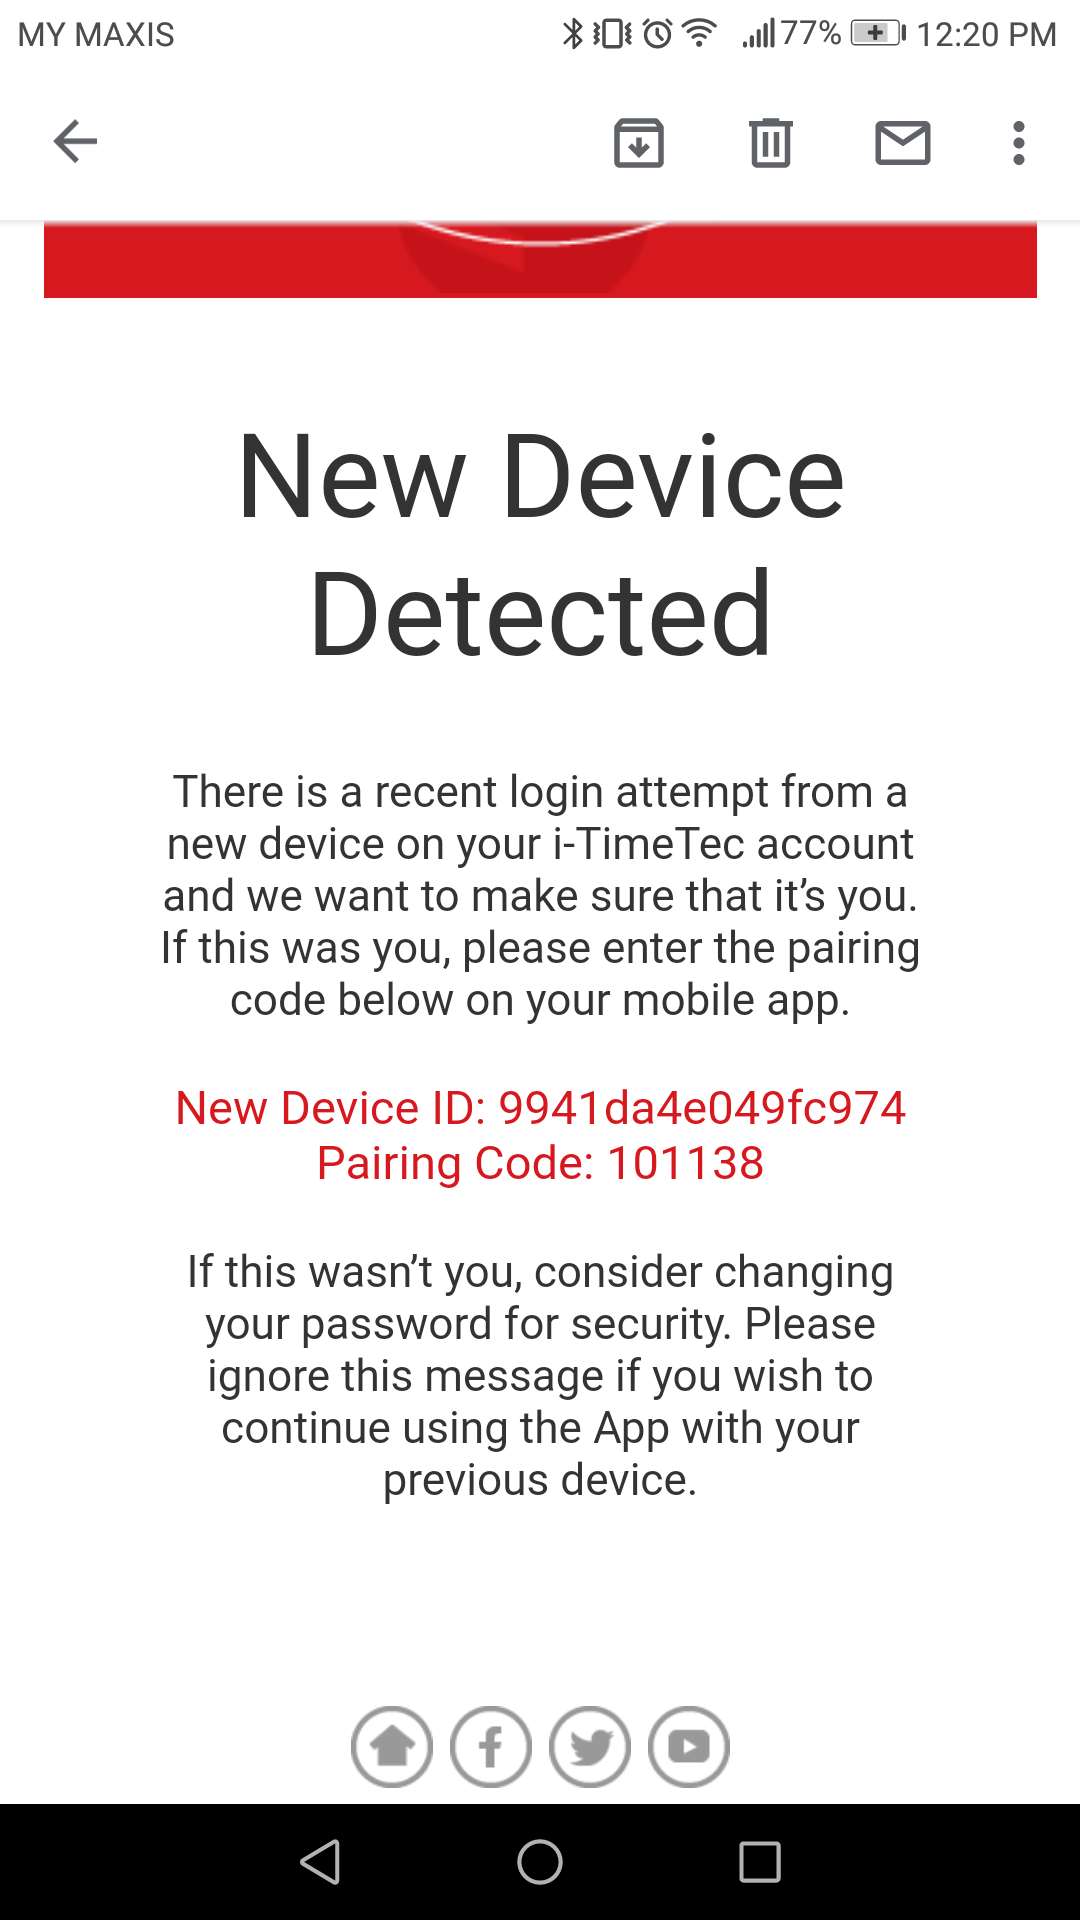
| 8. You can find the pairing code that is sent to your registered email inbox. if it is not there, you may try to look for it in the ‘spam’ folder, remember to mark it as “Not Spam”. |
|
| 9. Open the email to get the pairing code, in this case, the pairing code is 101138. Key in pairing code in screen #7 then your i-TimeTec user account is ready to use. |
Sign in > Read tips and guides
Once you have activated your registered account, sign in using the login email and password that you have created, and you will see some startup guides as shown below:
|
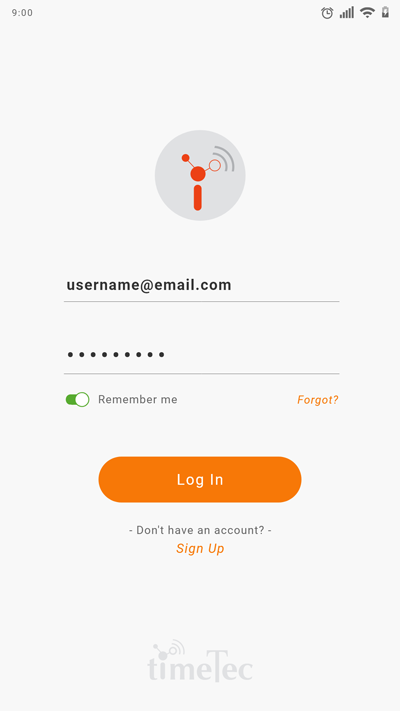
| 1. Fill in login email and password, tap "Sign in". |
|
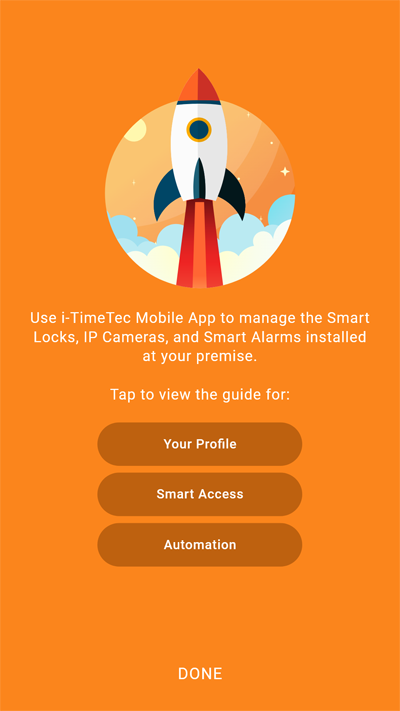
| 2. You will see tips and guides we have prepared for you during first sign in. Tap on "Smart IP Cameras" to read the tips. |
|
| 12. You will see this main menu page. |
Configure Smart Gateway with Camera
Make sure you have turned on the wifi of your premise, power up the device, get ready your smartphone with a registered i-TimeTec App near your device.
|
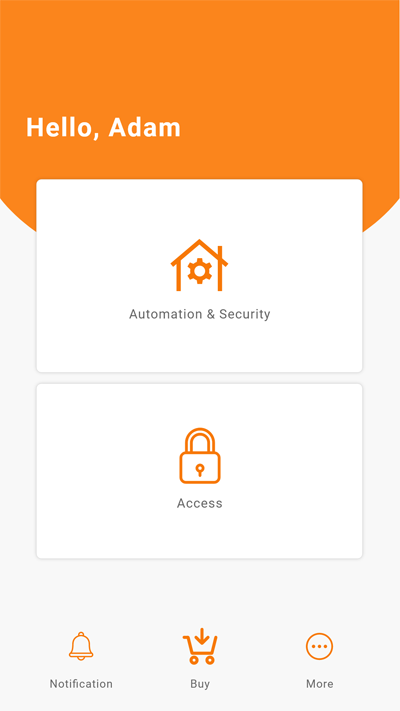
| 1. At the main menu, tap “Automation & Security” to start configuration. |
|
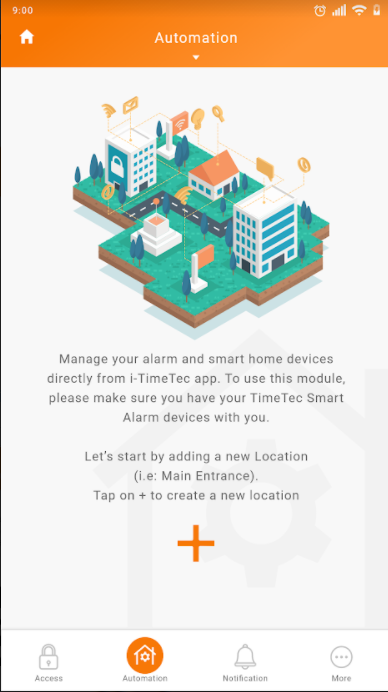
| 2. Tap “+” to add your device. |
|
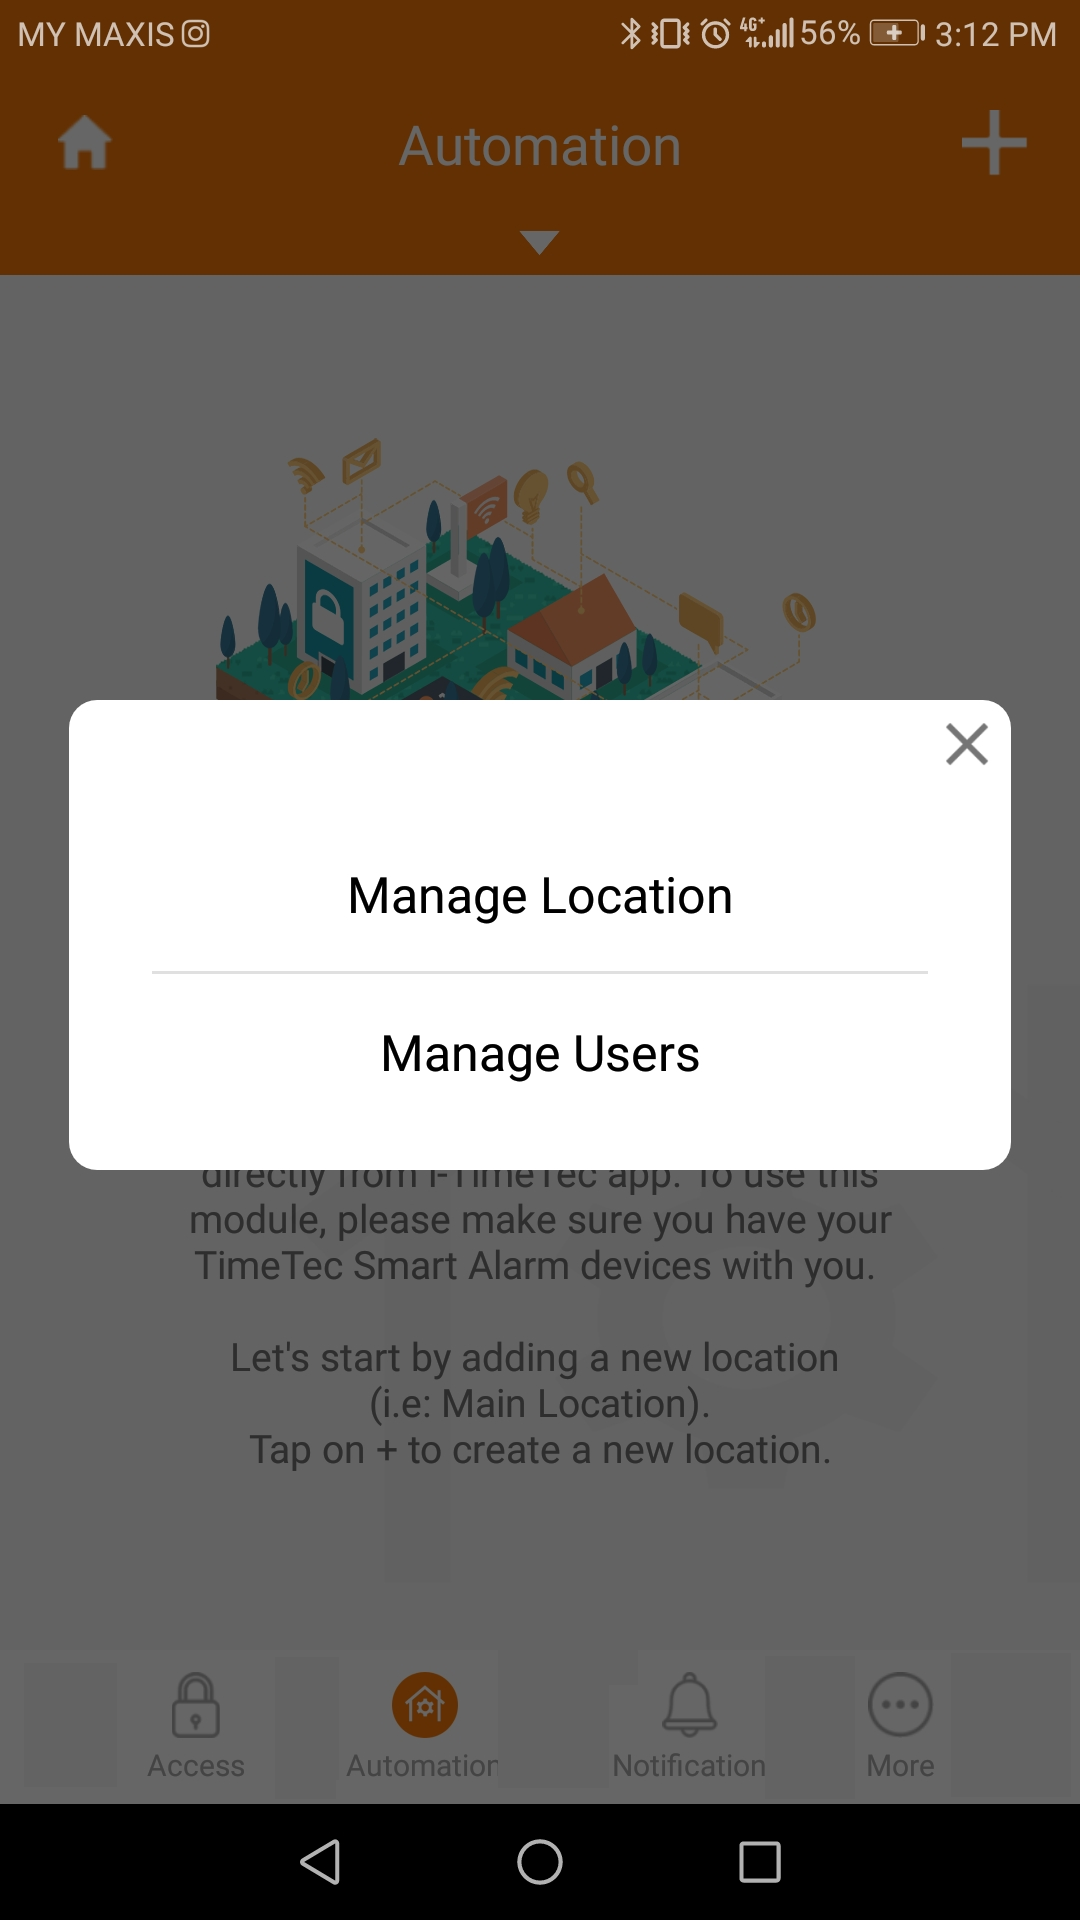
| 3. Select “Manage Location”. |
|
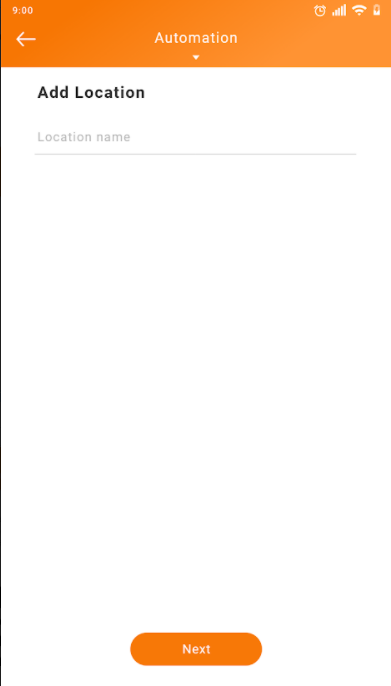
| 4. Add location that you will install this gateway camera, for eg “Home”. |
|
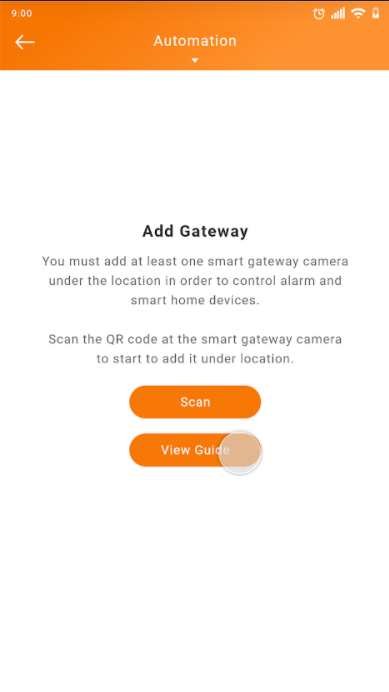
| 5. You will be led to this page and able to read more guides about the configuration. You are encouraged to read all the guides prepared here. |
|
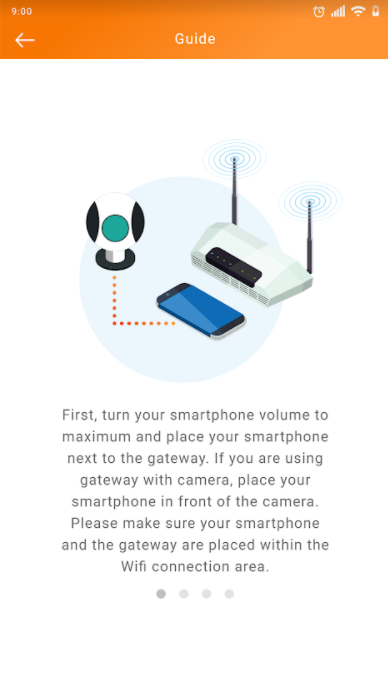
| 6. Guide 1: Get your device and wifi ready as per described. |
|
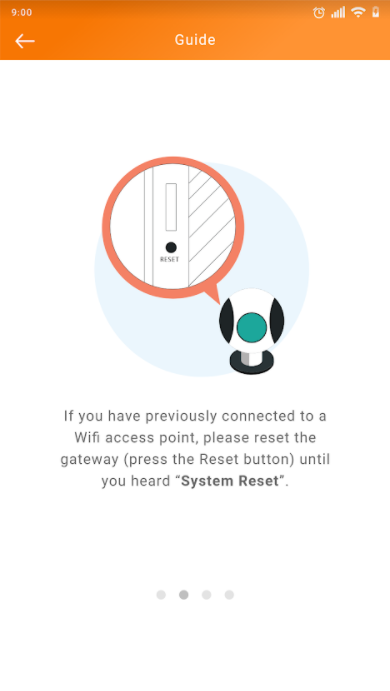
| 7. Guide 2: Ignore this step if this is the first time you setting up the smart gateway device. |
|
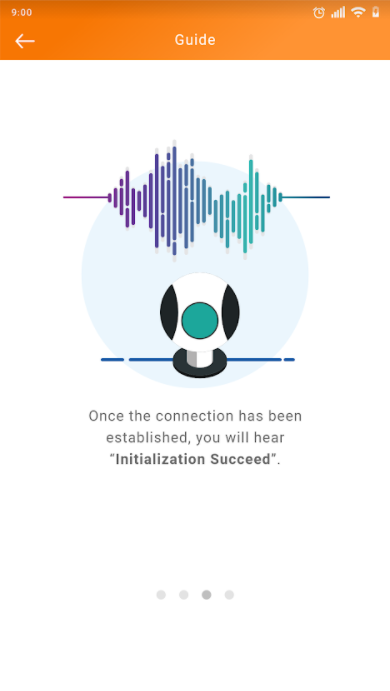
| 8. Guide 3: Step to confirm connection is established between your wifi and gateway. |
|
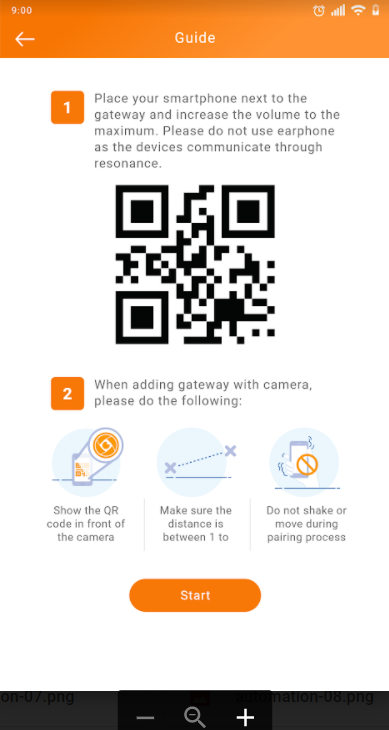
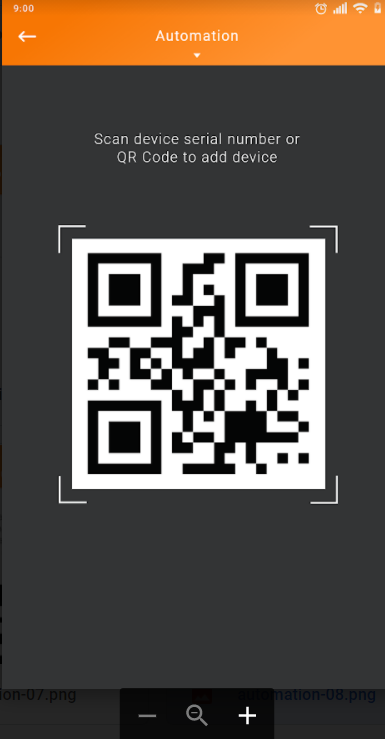
9. Guide 4: This is the guide for you to take note when scanning the QR code on the smart device.
Tap “Start” to scan your QR code.
|
|
| 10. Scan the QR code of the gateway, usually the QR code sticker can be found at the bottom of the gateway. |
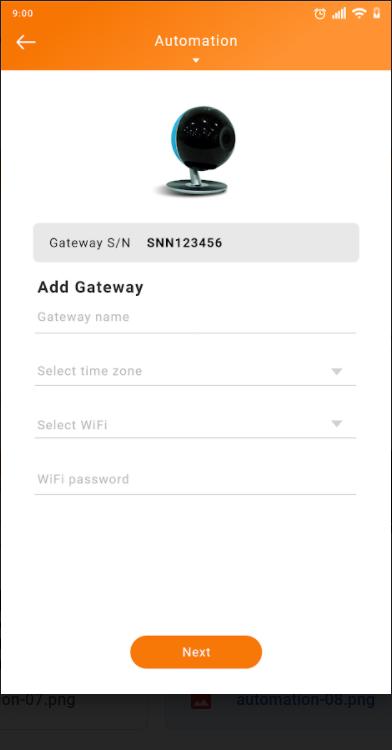
|
| 11. Fill up the fields. You will hear some digital sound when the device is trying to connect with the wifi. Then you will hear a voice prompt “Configuration success, welcome to use” which indicates that the configuration is successfully done. |
|
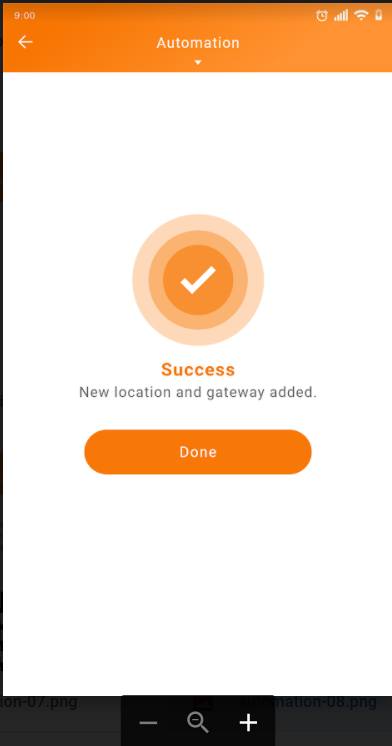
| 12. Congratulations, you have successfully added a new location and smart gateway with camera. You can proceed to add other smart devices by binding with this gateway. Smart gateway with camera can bind with maximum 36 smart devices, within 100m in same level, depending on zigbee coverage strength.
|
Try Arm/Disarm and other functions
Try to arm and disarm the alarm to check if the smart gateway with the camera works perfectly. As the gateway has a built in siren and motion sensor, you can trigger the alarm by moving in front of the camera when it is armed.
|
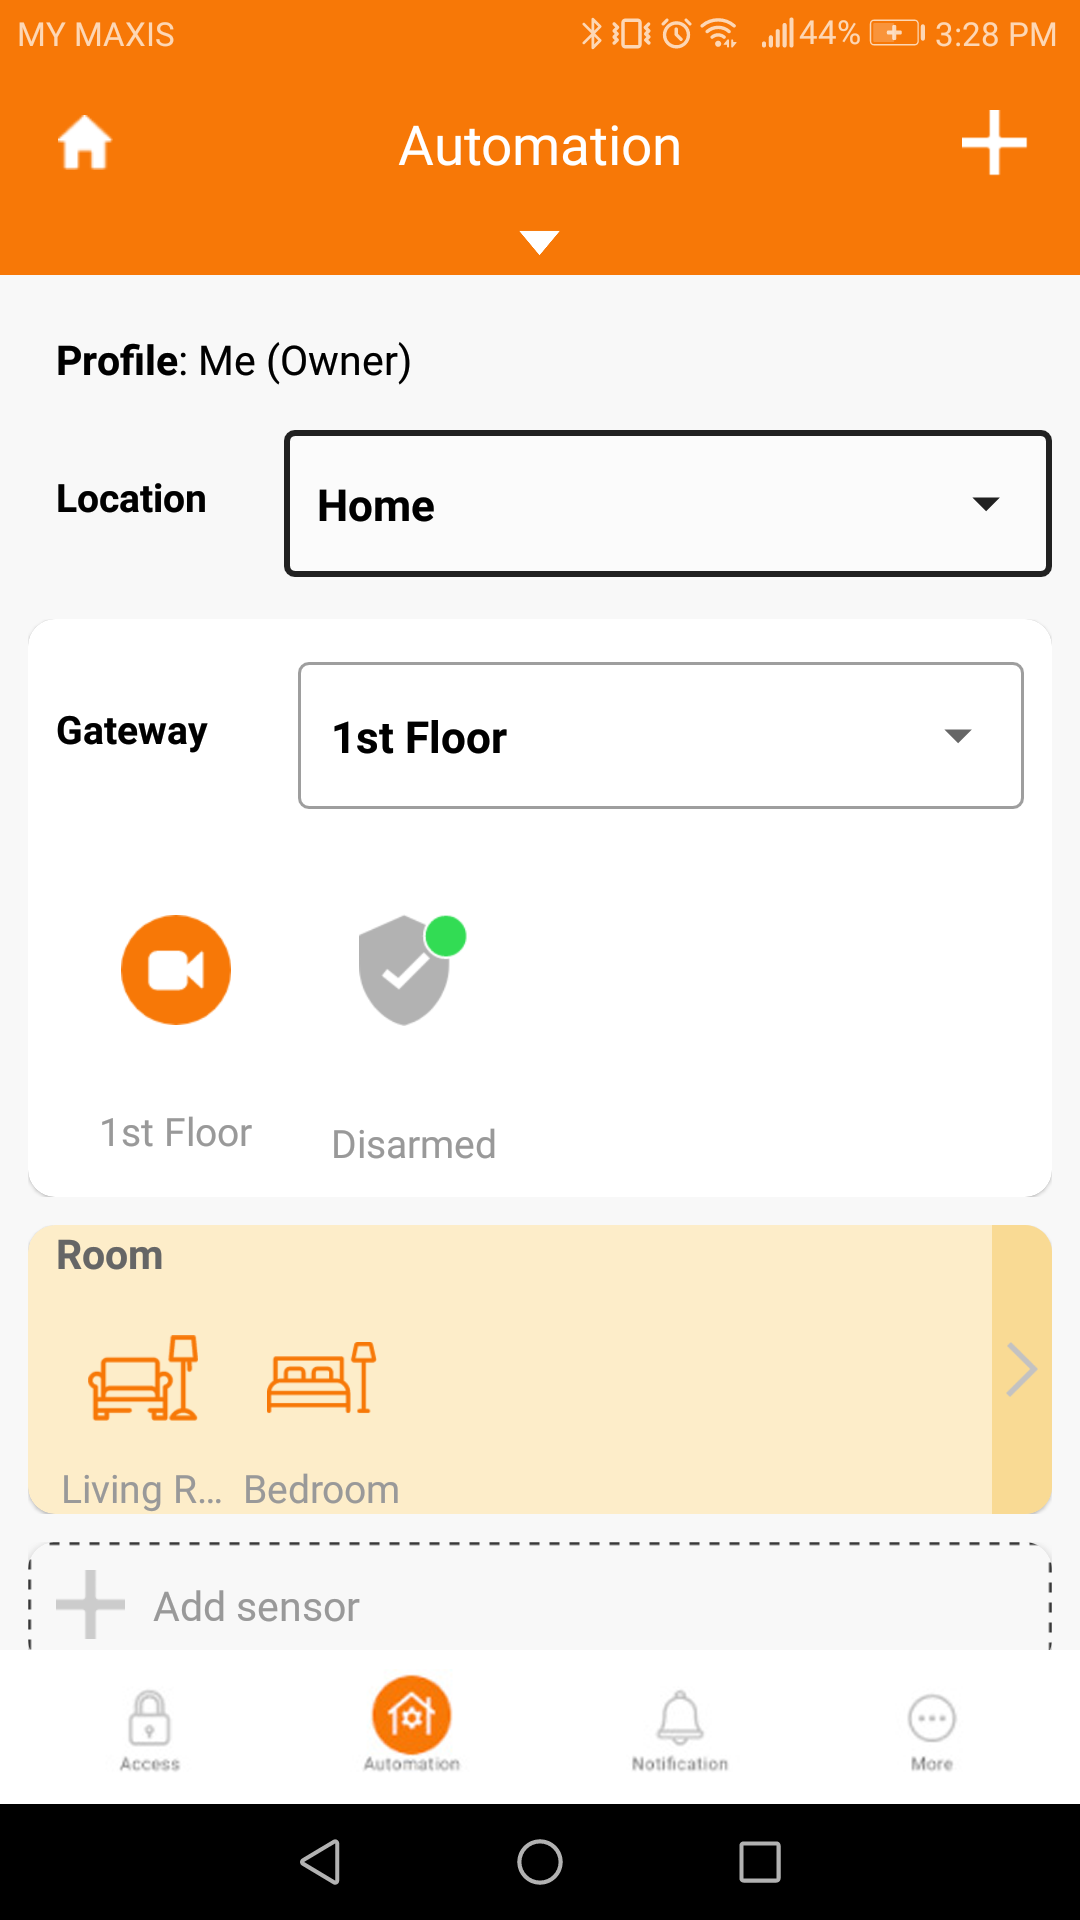
| 1. At main menu, tap “Automation & Security” |
|
| 2. You can see your newly added Gateway in orange camera icon, and its status “disarmed”. To arm the gateway alarm, you can tap on the grey “disarmed” icon directly, or you can tap the orange camera icon of “1st Floor” gateway to go to the gateway page. |
|
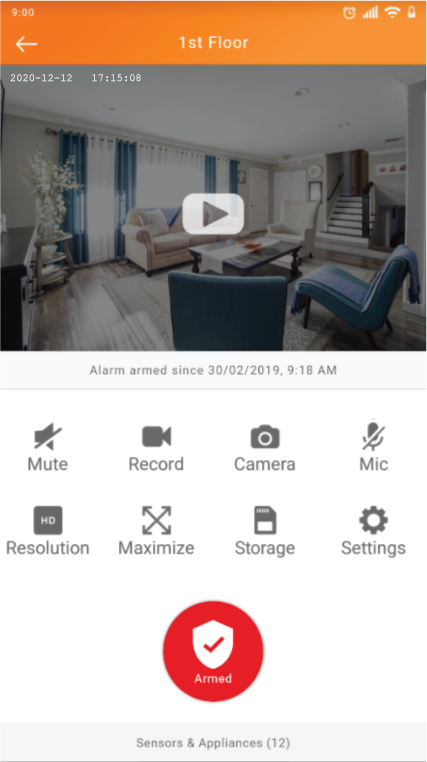
| 3. Tap the grey “Disarmed” button to arm the alarm. It will launch a 5 seconds countdown timer where you are still able to disarm it. When the alarm is armed, you will receive a push notification in your phone.
|
|
| 4. When the smart gateway camera is armed, try to create movement in front of the camera to trigger the alarm. When the alarm is triggered by the motion, the gateway camera will start to generate loud siren sound and auto-capture a photo instantly. You will also receive push notification instantly in your phone. The photo captured can be found in i-TimeTec > bottom menu > Notifications > Automation > Alarm Alert. |
Note: How to stop the siren?
Press the red “Armed” button to stop it. If it shows a grey “Disarmed” button, please press it twice to stop the alarm siren. Please note that even if you did not arm the alarm, moving the sensors around will be seen as ‘demolishing’ the system hence it will trigger the alarm siren. If you have a panic button installed, you can long press the panic button for 5-10 seconds (until the red LED light on the panic button blinks) to stop the siren.
If you stop the siren by long pressing the panic button, you will need to tap on the ‘disarmed’ and ‘armed’ button in the app to re-activate the alarm.
Other features of Smart Gateway with Camera:
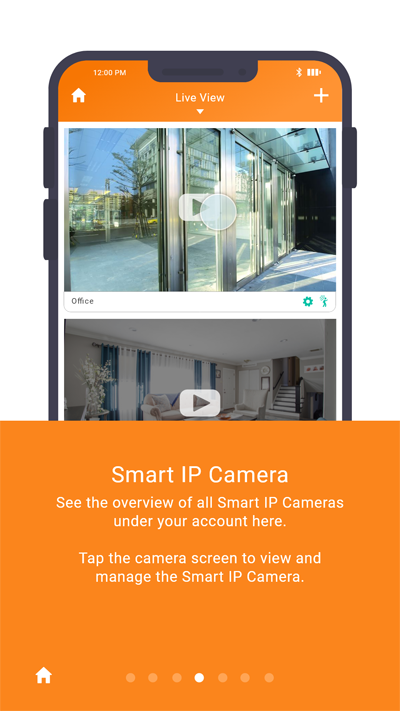
Live view:
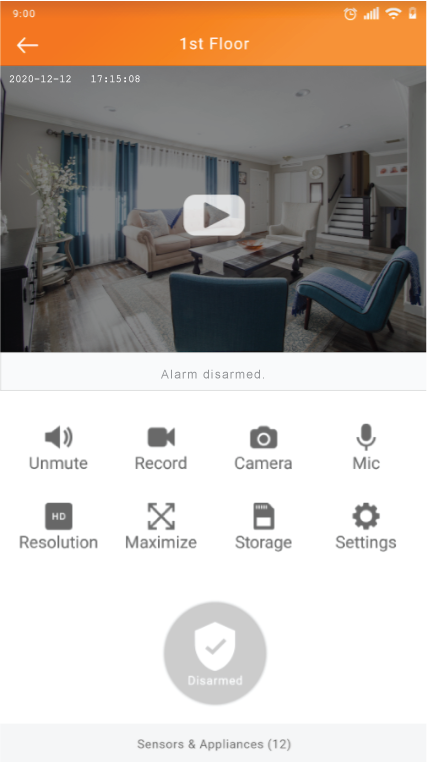
You may try other functions such as tapping on the camera screen or “play” button to view the live stream from the gateway camera. Tap again to pause it. You can know if the view is live by observing the time & date at the top left corner.
Mic & Speaker:
As the gateway camera comes with a built-in mic and speaker, you can test the speaker and mic by:
Tap the “play button” on the camera screen, and then tap “unmute” and “mic” to test the mic. Suggest to stand further from gateway to avoid echo.
Record video:
You can tap the “record” icon to start recording live stream, tap “record” again to stop it.
Capture footage:
You may tap the “camera” icon to capture footage.
Maximize:
Tap “Maximize” to view in full screen (horizontal), change resolution between HD (high definition) and SD (standard definition).
Storage:
View the recorded videos and captured footages from this gateway camera.
Settings:
Do all necessary settings by tapping the ‘settings’ icon.
After successfully configuring Smart Gateway with Camera, you can proceed to add other smart devices.