Configure Door/Window Magnetic Sensor
|
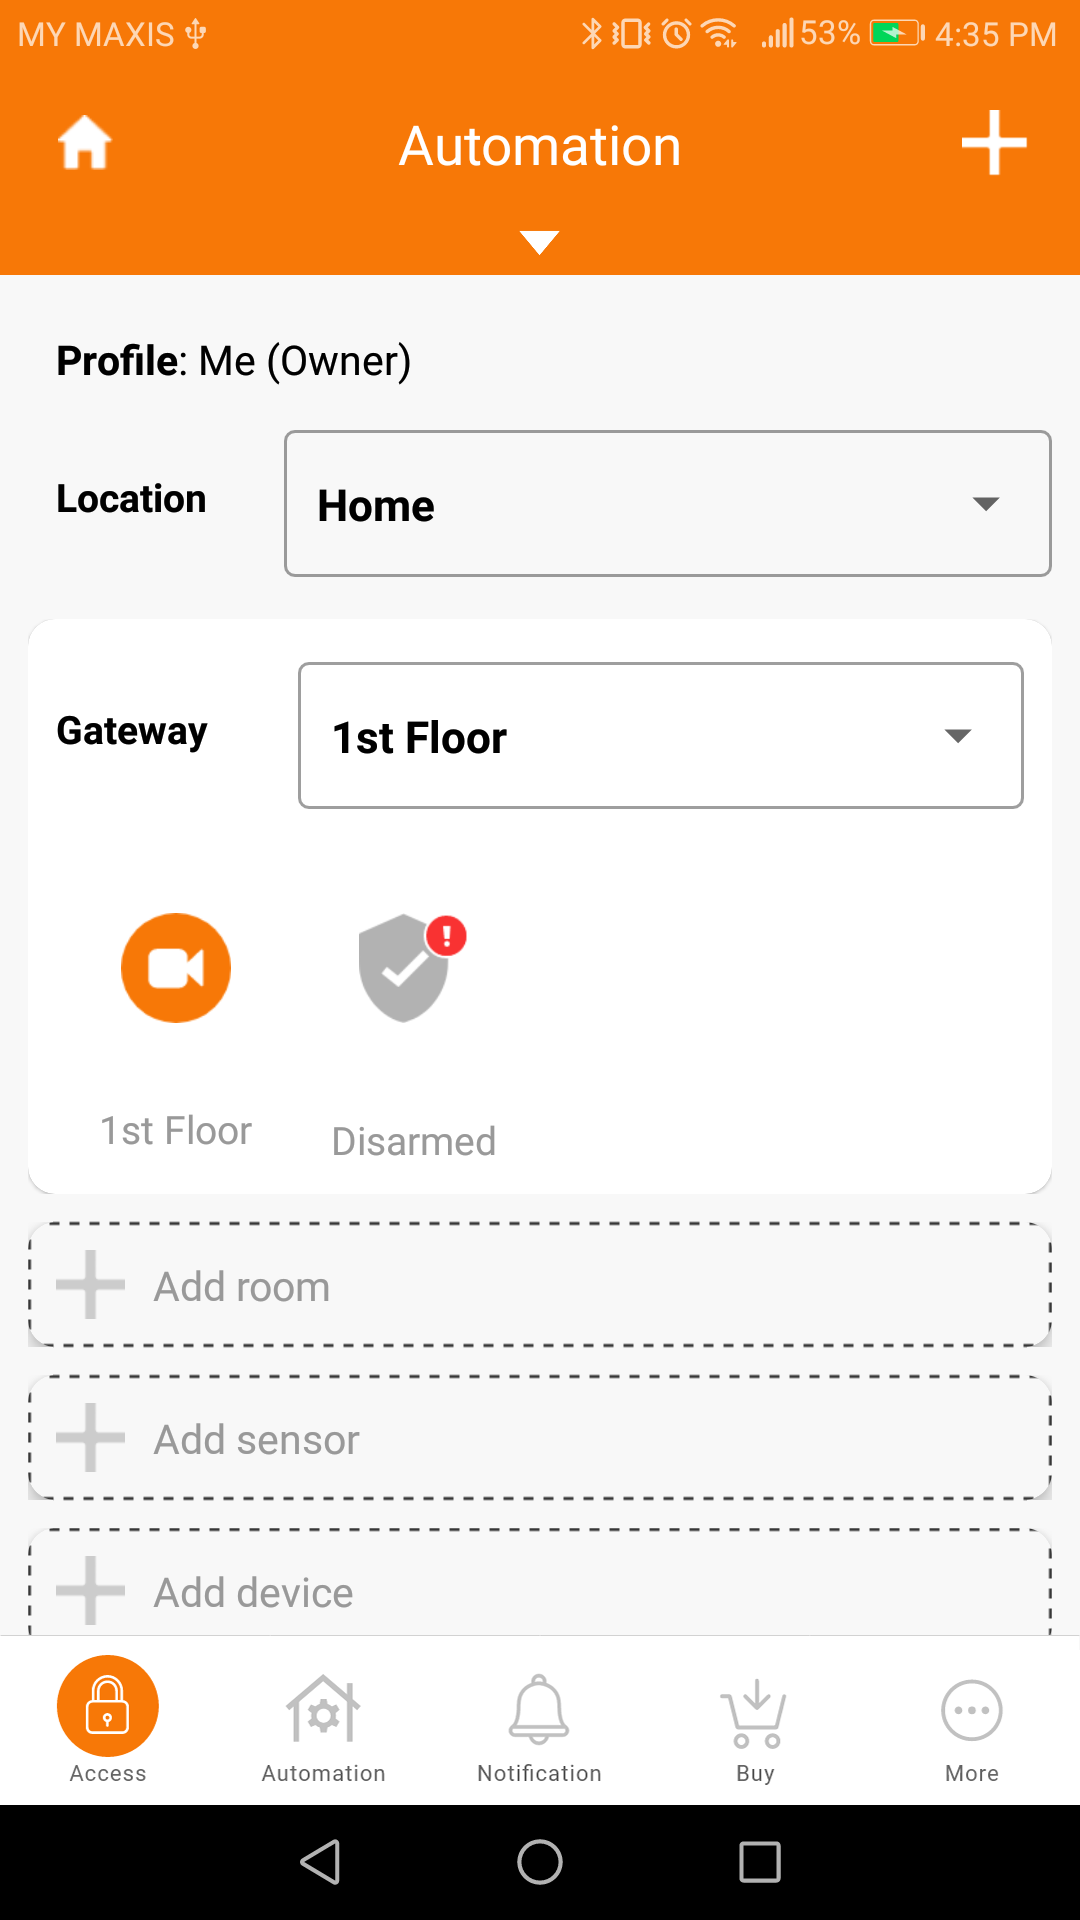
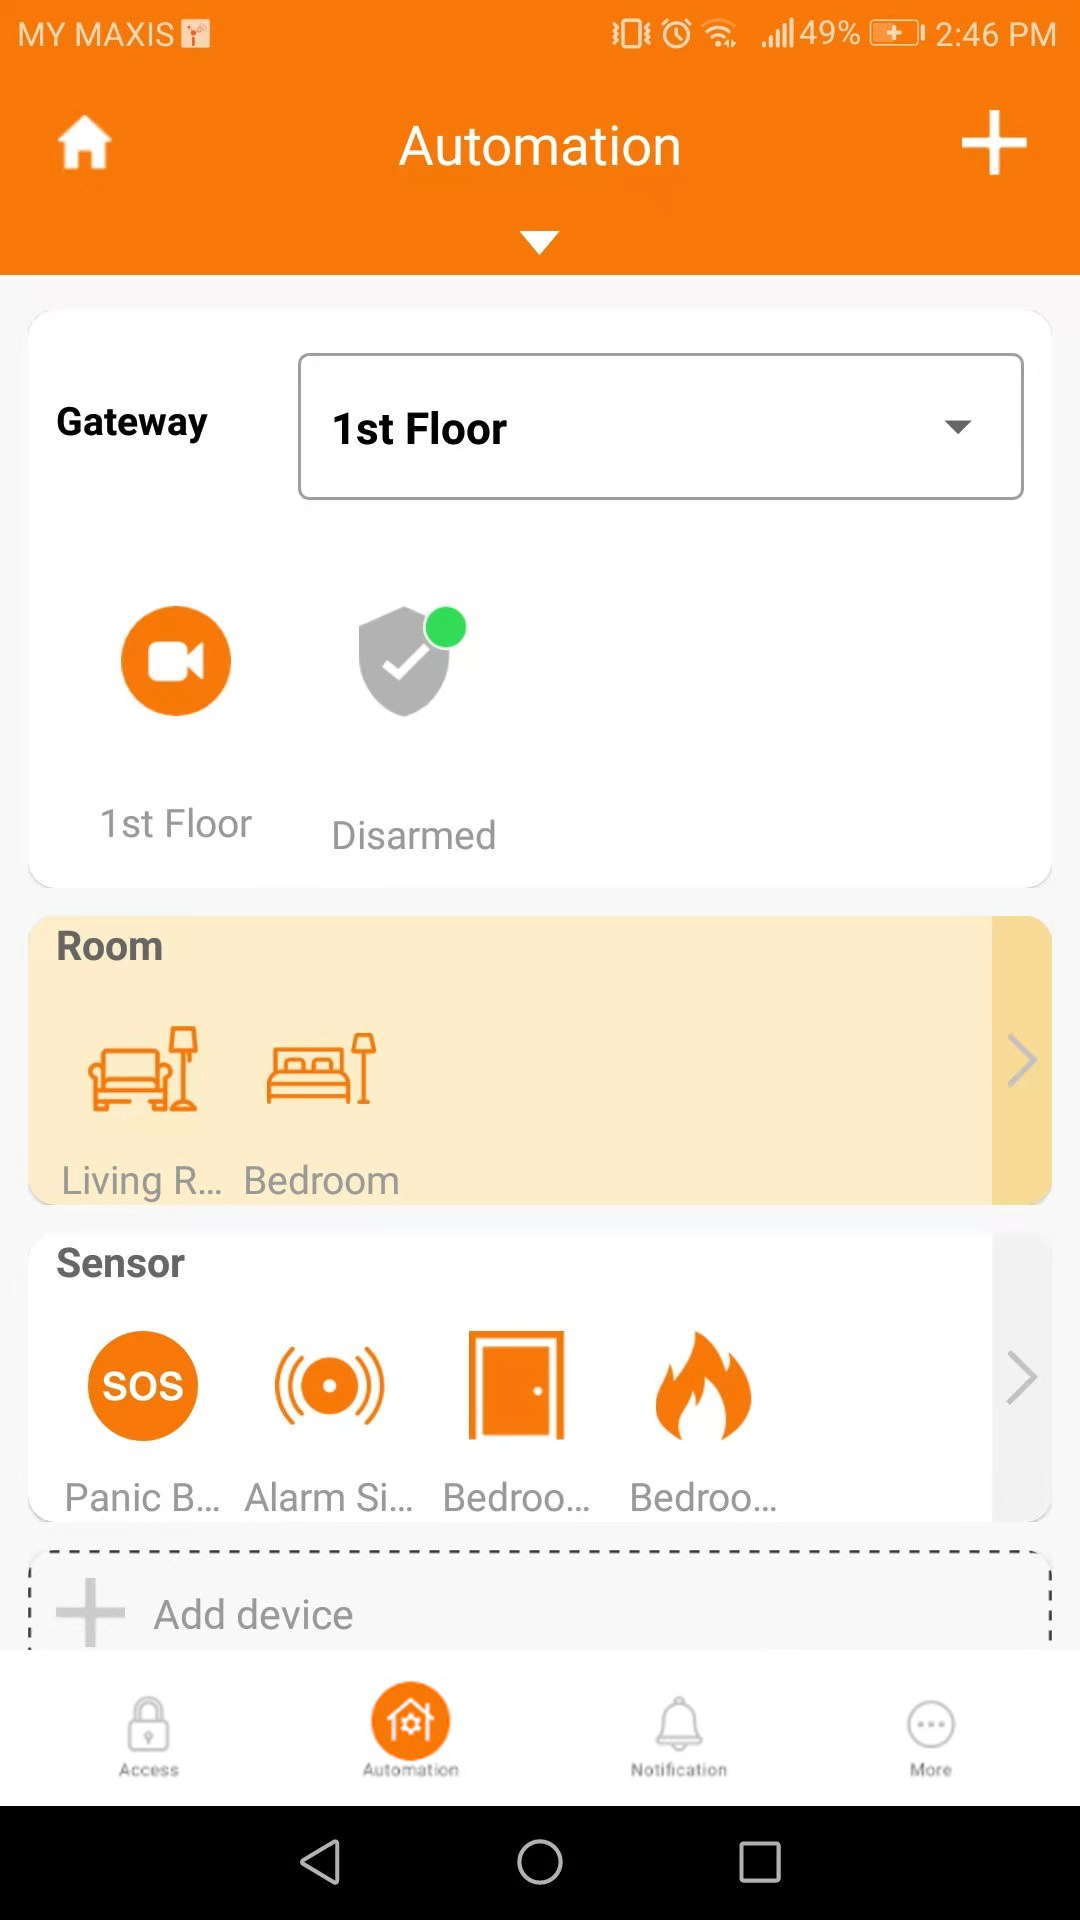
| 1. At the i-TimeTec main page, tap “Automation & Security” to start. |
|
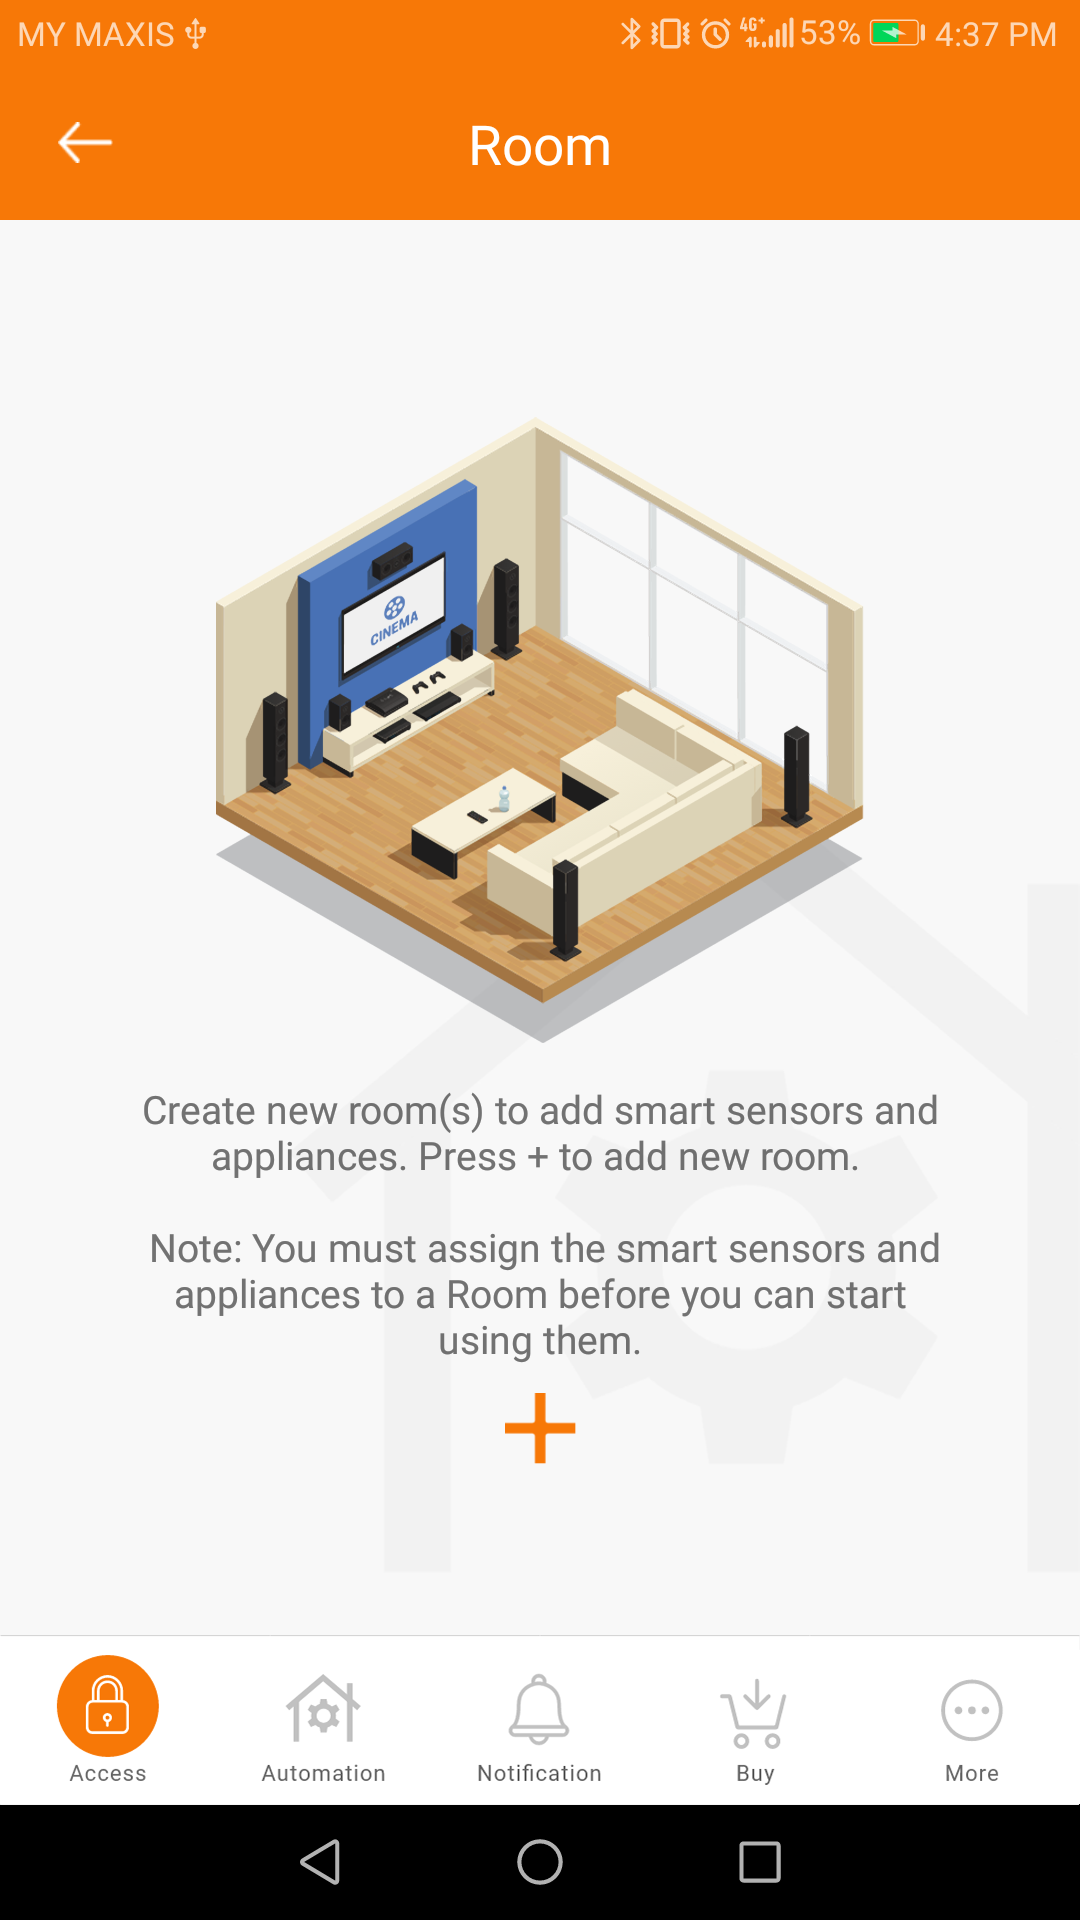
| 2. You must create a ‘room’ to start adding a sensor. Tap “Add room” to create a room. (If you have already created a room for this sensor, you can skip these steps and go to step 7 directly.) |
|
| 3. Tap “+” to add a room. |
|
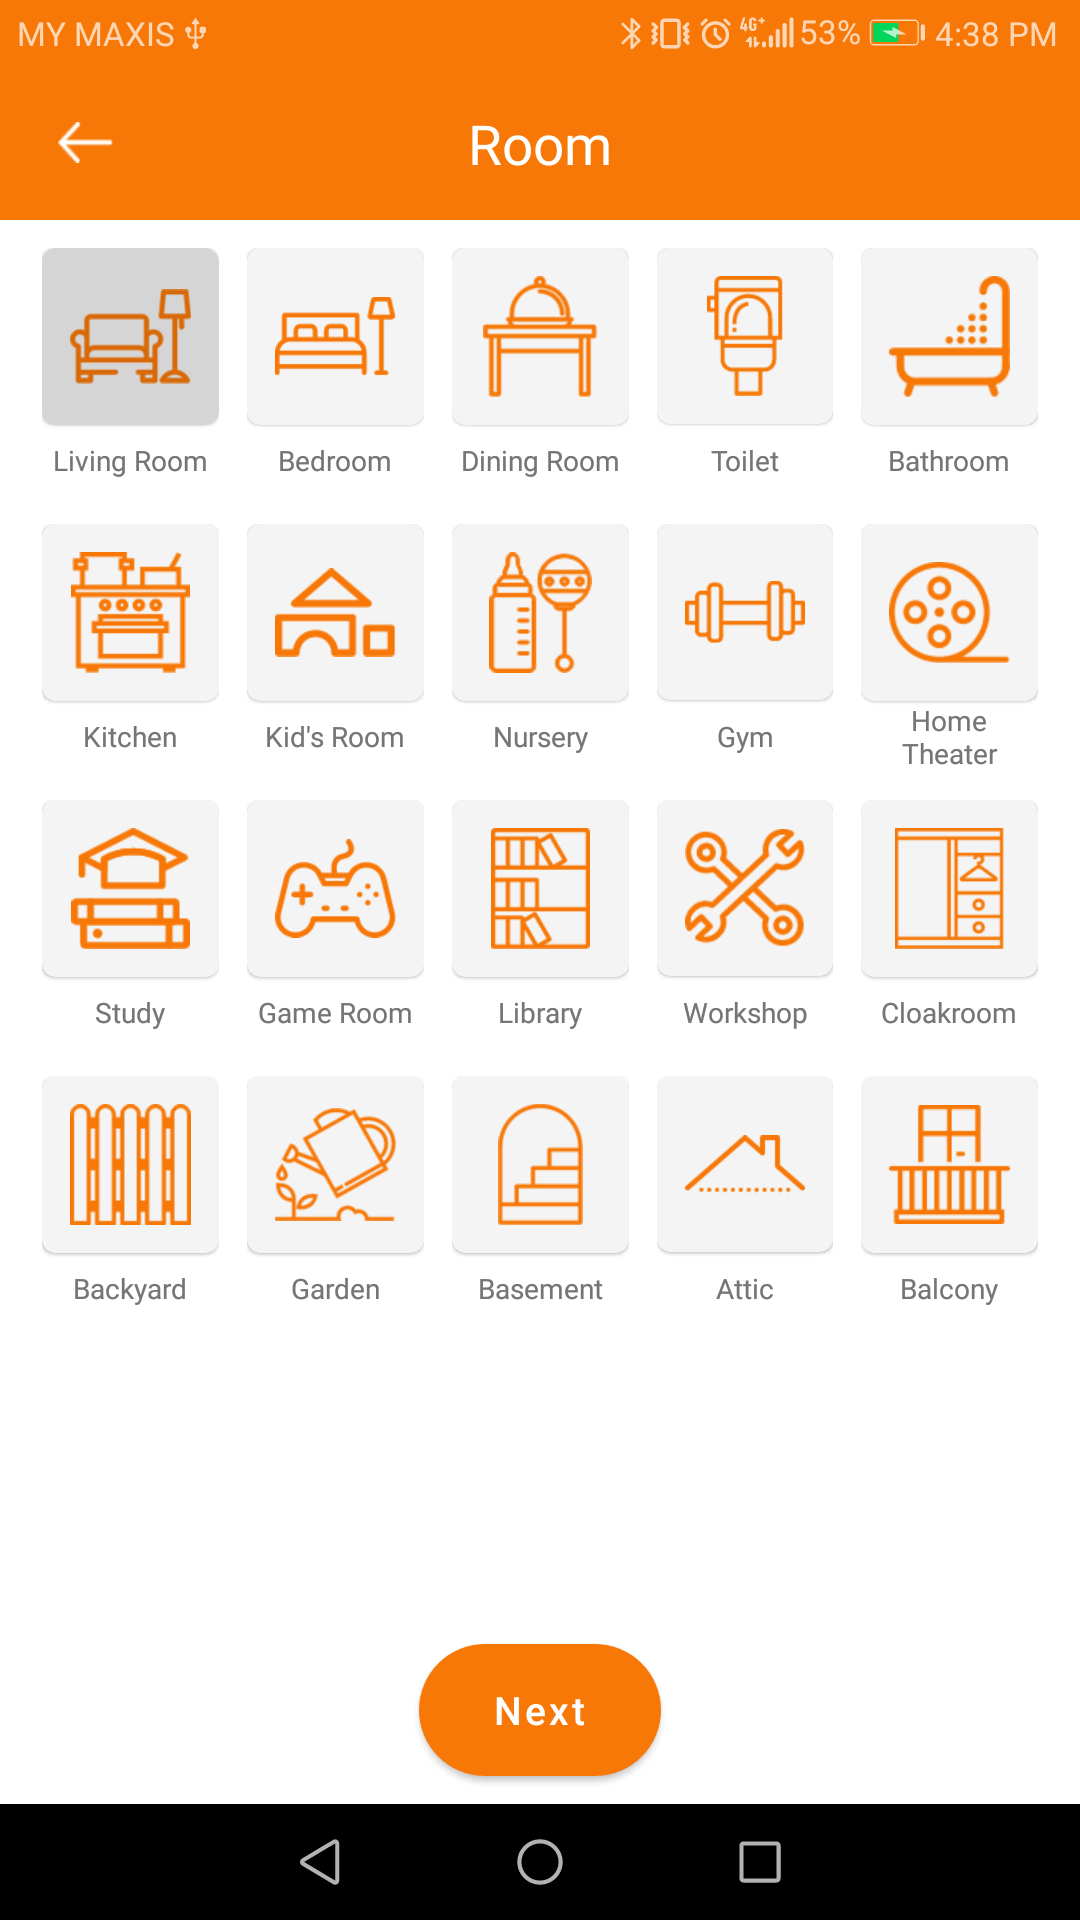
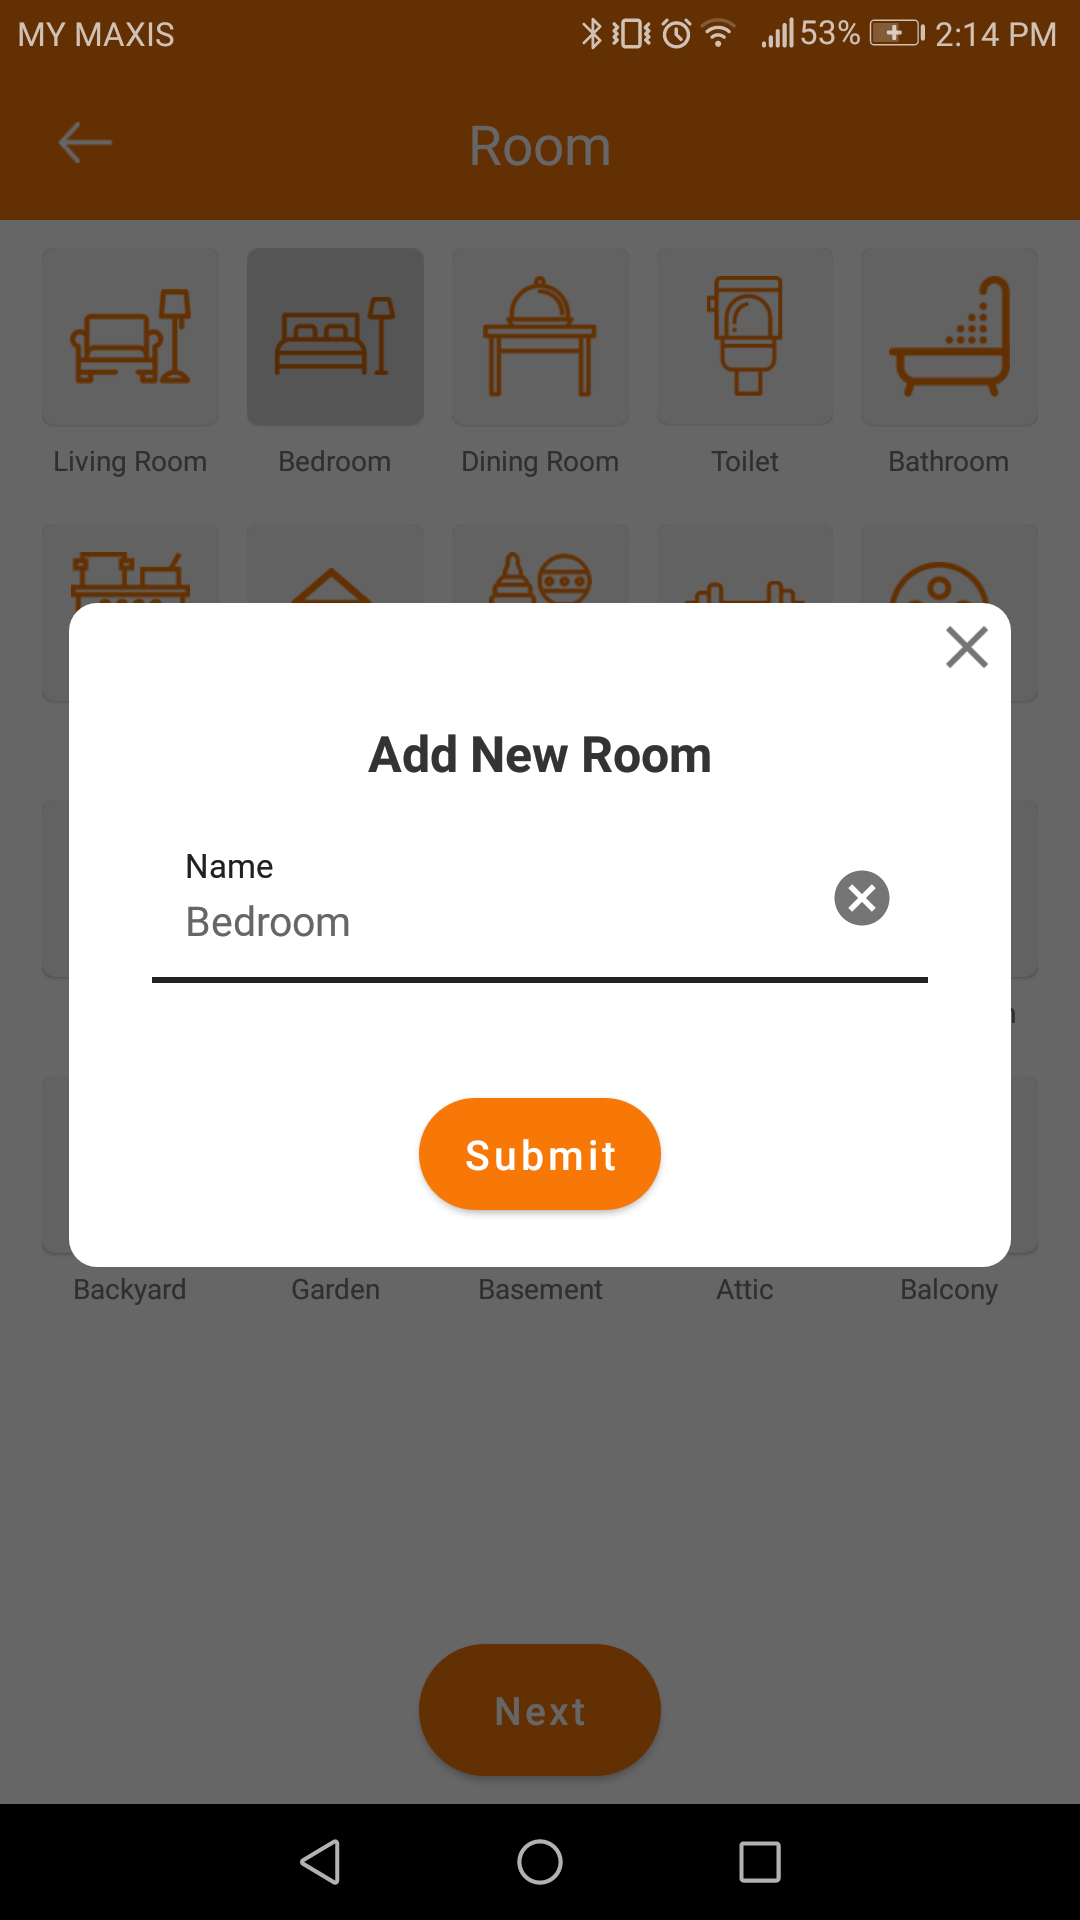
| 4. Select “room” from the list, tap “next” to continue. |
|
| 5. You can rename the room name if needed. Tap “submit” to continue”. |
|
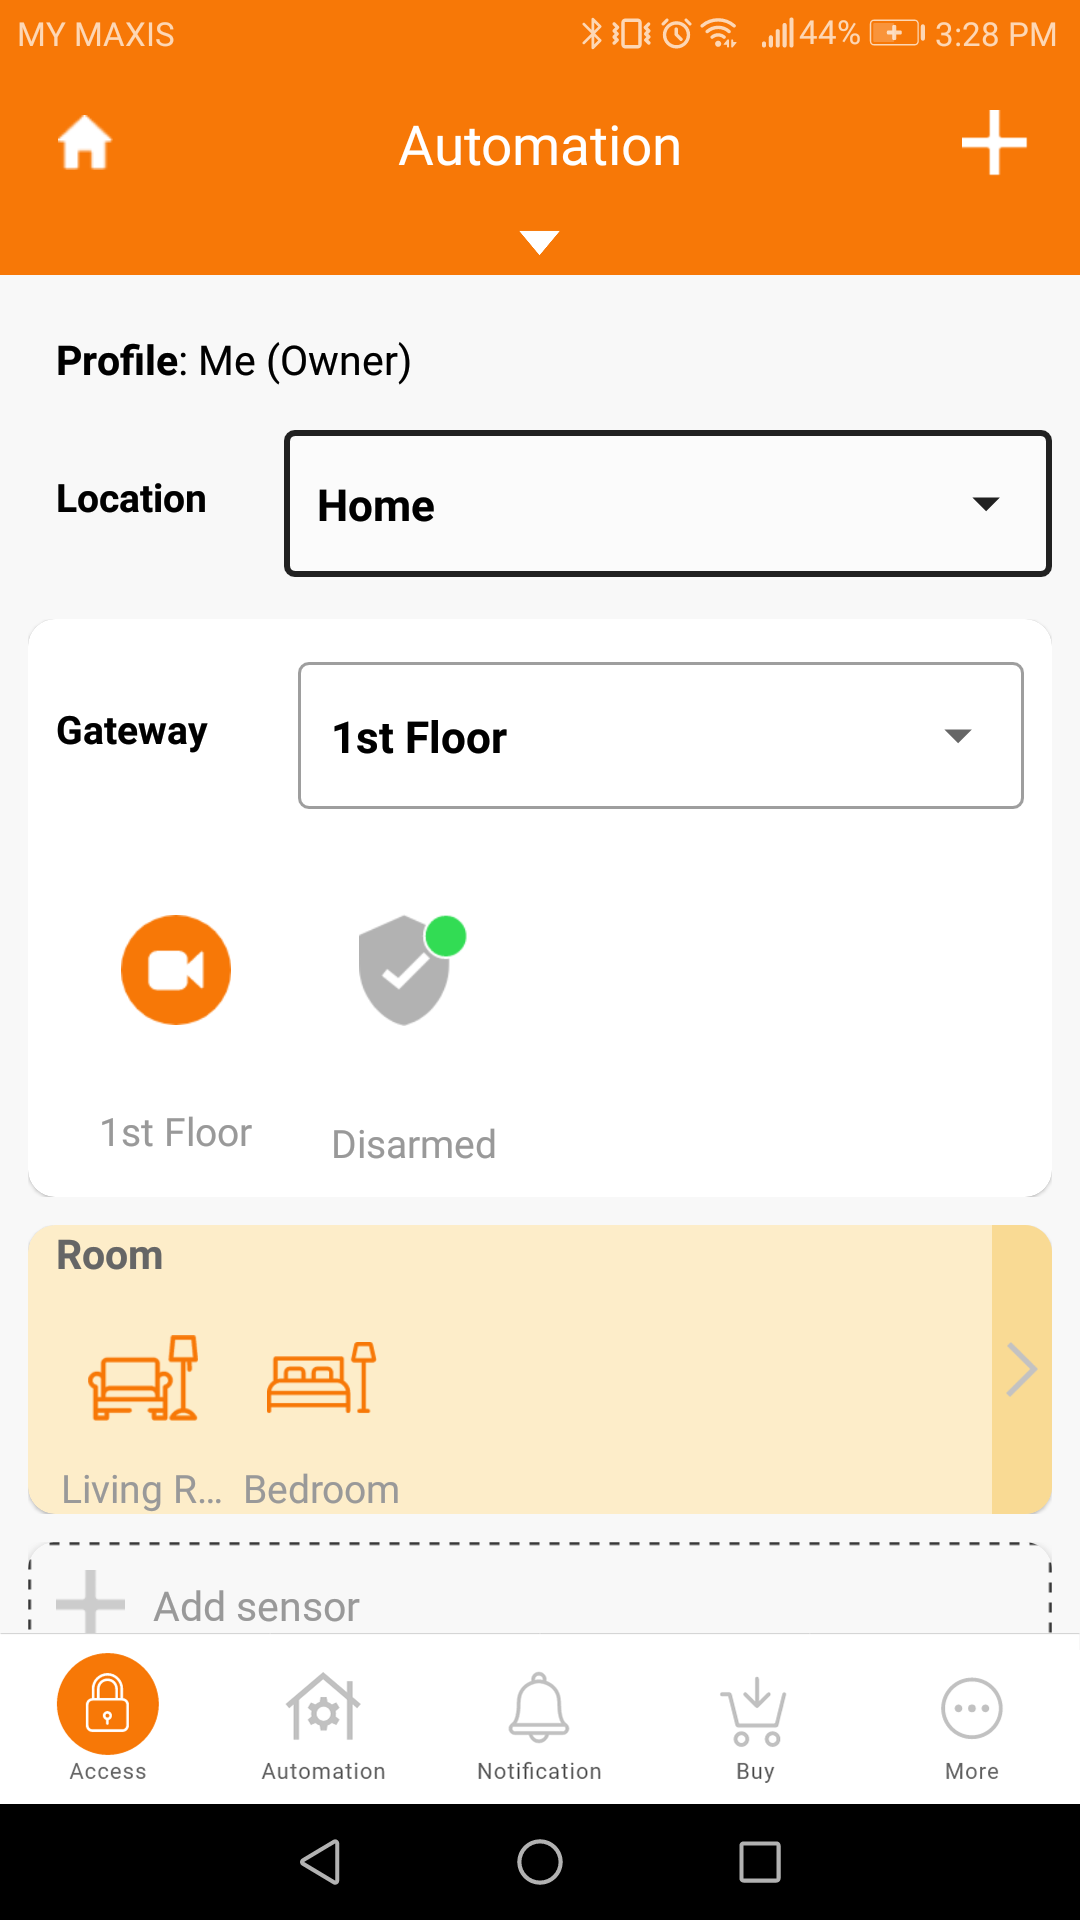
| 6. Room has been added. You can see it in the Automation & security page. Tap on the + at top right to continue. |
|
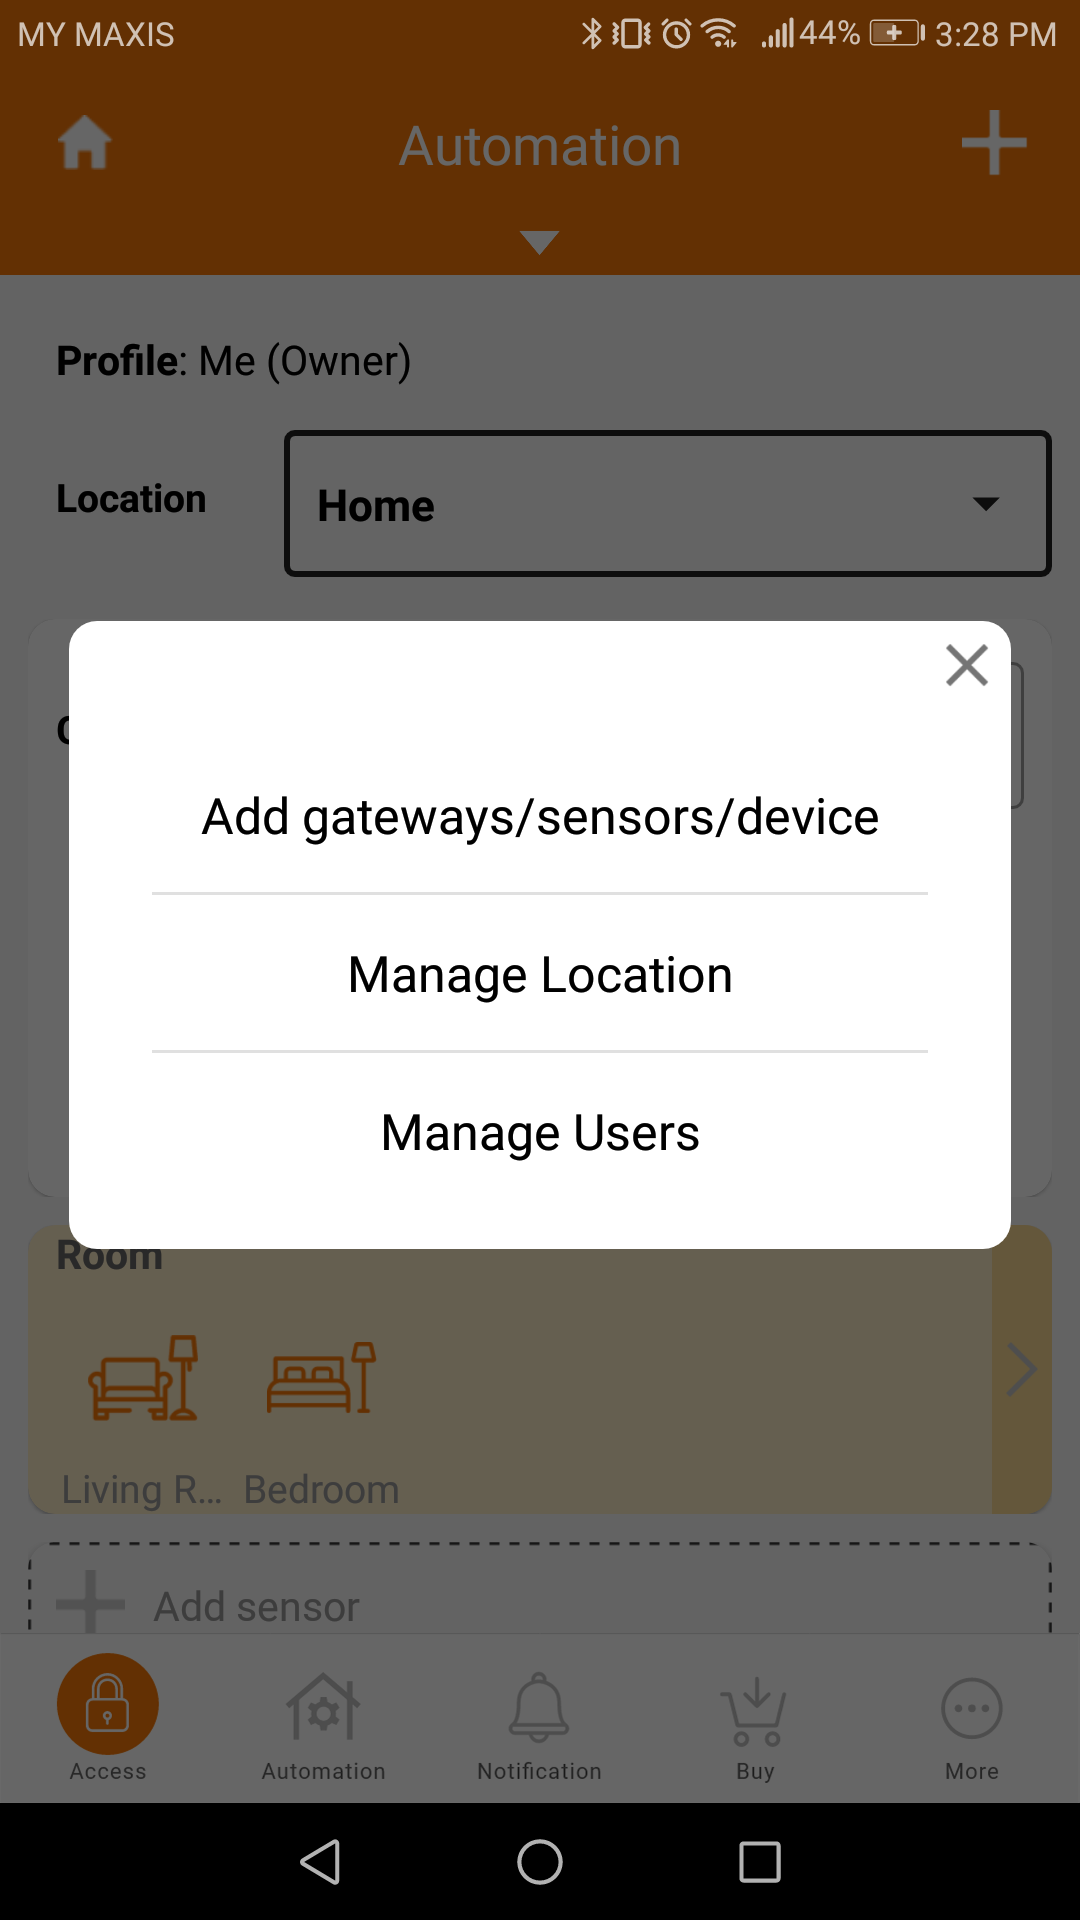
| 7. Tap “Add Gateways / Sensors & Devices”. |
|
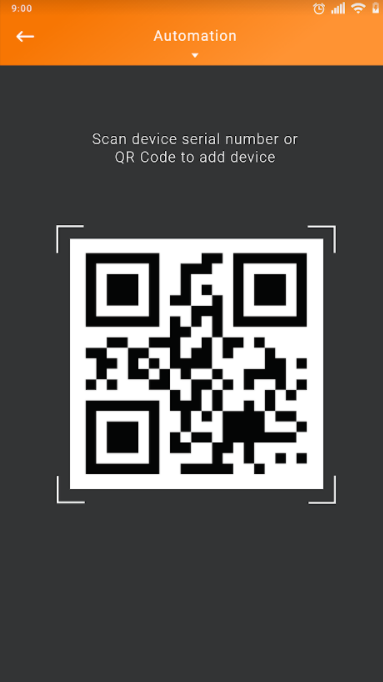
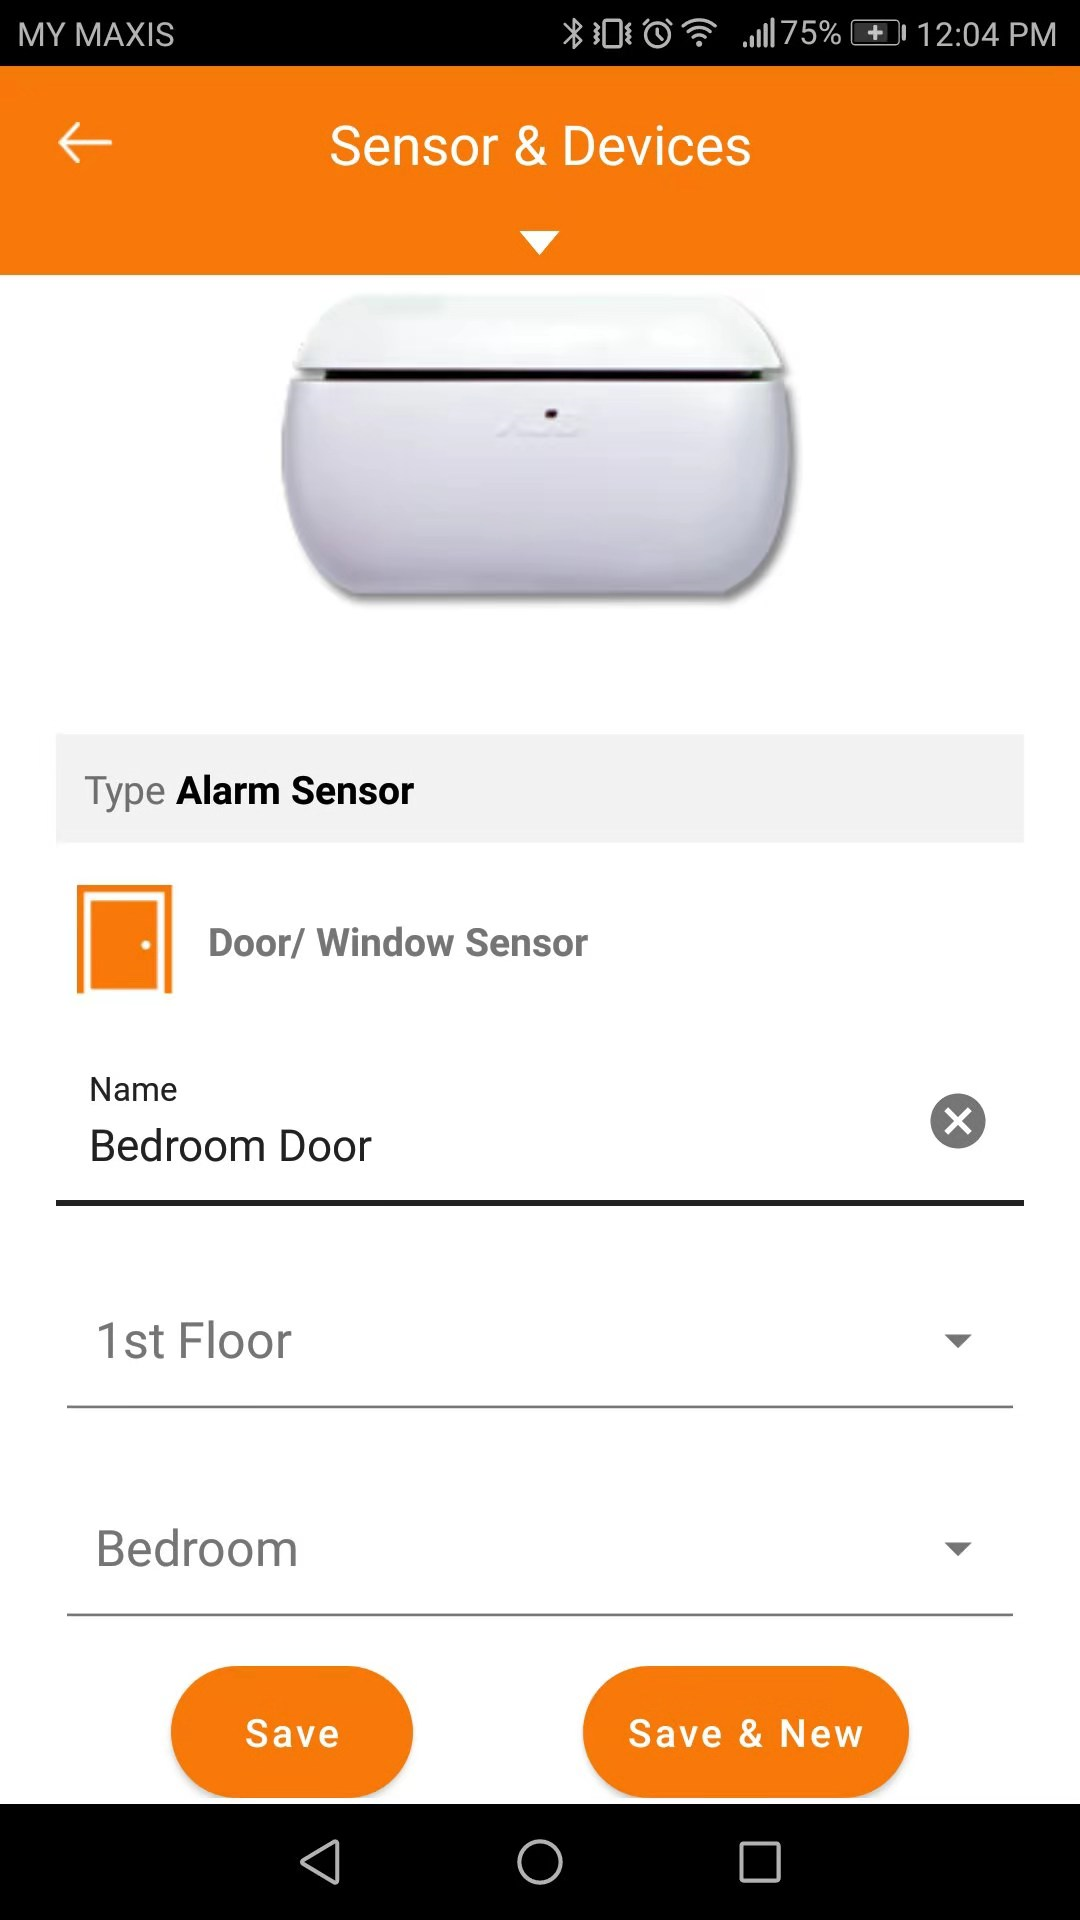
| 8. Scan the device QR code to continue. You can find the QR code behind the magnetic sensor, open up the lid by pushing it following the open arrow indicated on the back lid. |
|
| 9. After QR code is scanned, it will open up this page. Fill up all the fields, bind it with a smart gateway and select the room that the sensor will be installed at. Tap “Save” and the door sensor will then be added in your app. |
|
| 10. New door/window magnetic sensor is added. You can then proceed to stick the sensor on your planned area. |
As the sensor is tamper proof, when you move the sensor it may trigger the alarm siren, stop the siren when it is triggered.
Note: How to stop the siren?
Press the red “Armed” button to stop it. If you have a panic button installed, you can long press the panic button for 10 seconds to stop the siren.
Try Arm/Disarm to test the sensor
Try to arm and disarm the alarm to check if the Door/Window magnetic sensor works perfectly. You can trigger the alarm by separating the 2 components of the sensor.
|
| 1. At main menu, tap “Automation & Security” |
|
| 2. To arm the alarm, tap on the grey “disarmed” icon directly. Make sure other sensors (for eg smart gateway, PIR sensors etc) will not trigger the alarm to avoid confusion. When the alarm is triggered, tap to disarm to stop the siren. |
Note: How to stop the siren?
Press the red “Armed” button to stop it. If it shows a grey “Disarmed” button, please press it twice to stop the alarm siren. Please note that even if you did not arm the alarm, moving the sensors around will be seen as ‘demolishing’ the system hence it will trigger the alarm siren. If you have a panic button installed, you can long press the panic button for 5-10 seconds (until the red LED light on the panic button blinks) to stop the siren.
If you stop the siren by long pressing the panic button, you will need to tap on the ‘disarmed’ and ‘armed’ button in the app to re-activate the alarm.