 |
| Added Mobile ID for Device Login |
| To enhance the login and account security, we’ve added a new Mobile ID feature for device login. When users first login to a particular mobile device, a pairing code will be sent to the registered email. This code has to be entered at the login screen. After login is successful, the Mobile ID will then be linked to the user account in system records. Following that, if anyone tries to login to the user account from a different device, the system will in turn send an email to notify the user of the login attempt and provide another pairing code for the new device. Note that upon login, the new device’s Mobile ID will be linked to the user account. |
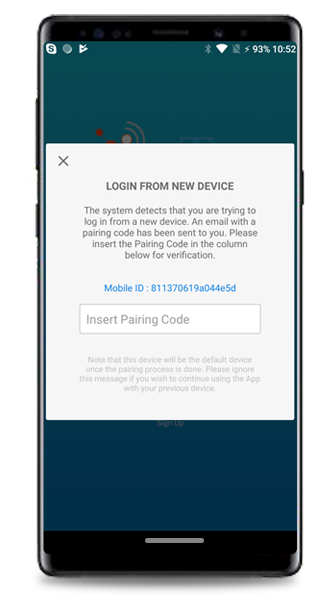
| a. Submission of Pairing Code |
| This message is displayed during first-time login and any subsequent login on a new device. |
 |
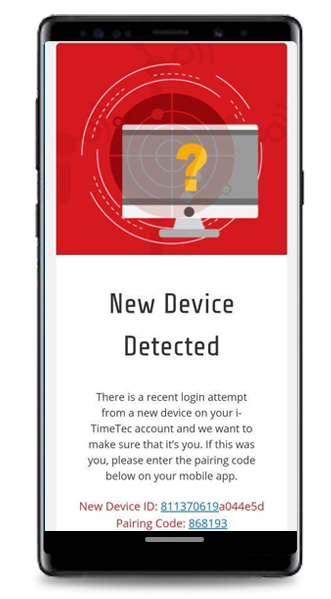
| b. Email to User (Login from New Device) |
 |
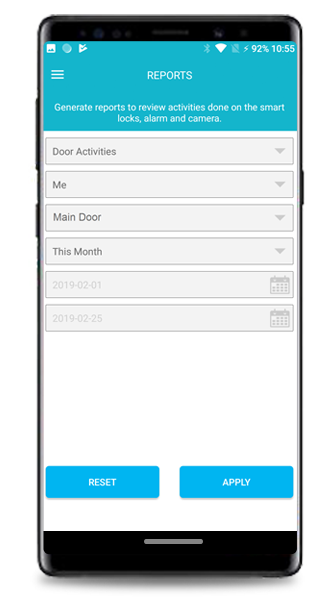
| New Module: Access Report |
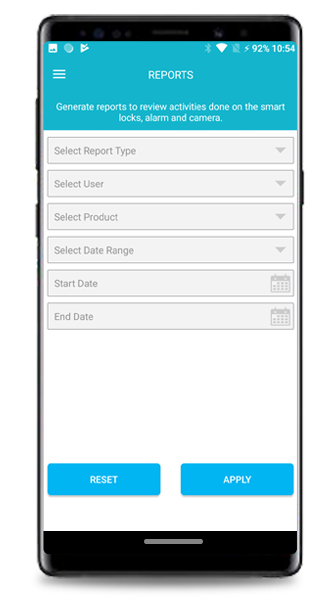
| In the latest release, we’ve introduced a new Report module for users to retrieve the access records. Currently, there are 3 types of report (in pdf format) in which the users can download directly from the Mobile App. When generating a report, you can also apply filters for Users, Date range and Product/Doors. |
| i. Door Activities Report ii. User Activities Report iii. Access Group Time |
| Please refer to the screenshots below for more details: |
| a. Report Selection |
 |
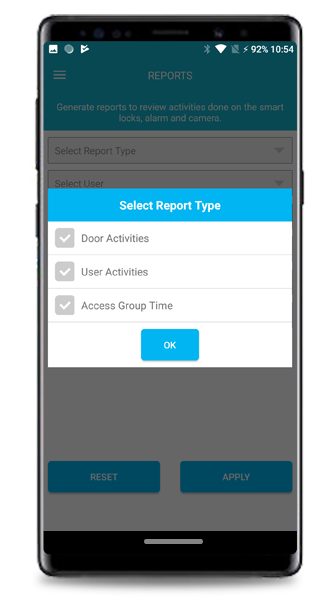
| b. Report Type |
  |
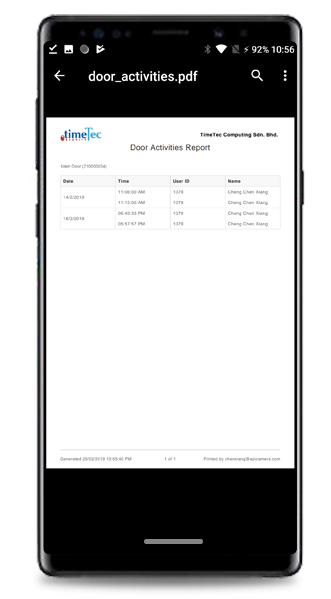
| c. Door Activities Report |
 |
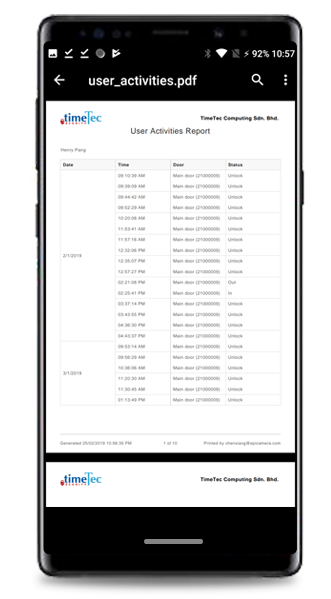
| d. User Activities Report |
 |
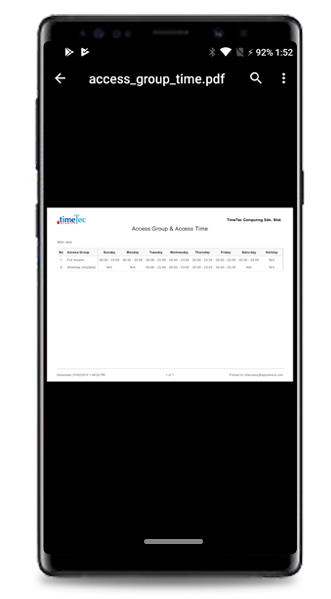
| e. Access Group Time Report |
 |
| Added Widget Unlock for BLE-2 and BLE-3 |
| In order to provide users with quick and convenient access to the Unlock function for BLE-2 and BLE-3, we’ve likewise released a Widget extension in i-TimeTec’s latest version. The basic details are as follows: |
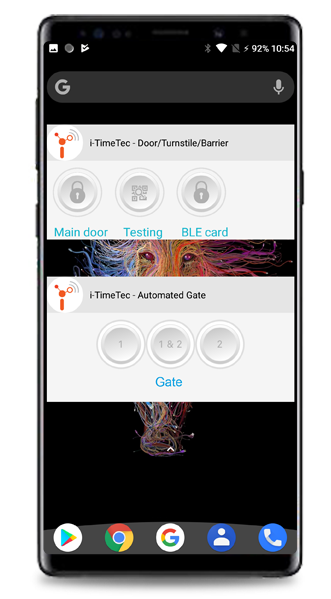
| i. i-TimeTec: Door/Turnstile/Barrier Once you’ve added the widget (e.g. to your Home screen), you’ll thus be able to view the doors along with the Unlock button icon. For BLE-2, users can directly unlock the door by tapping on this Unlock icon when approaching it. |
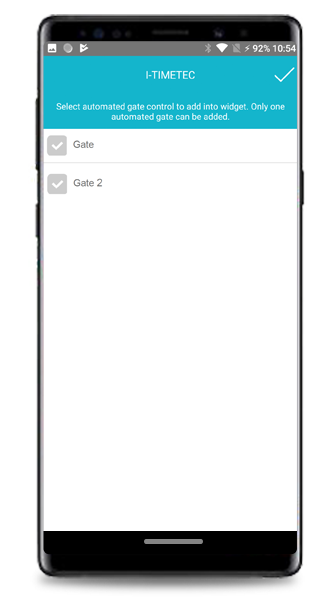
| ii. i-TimeTec: Automated Gate As for BLE-3, users will first need to define which door for the widget to perform the unlock action. This is carried out at the Configuration page whereby users can select the gate when launching the widget. Please be informed that users can only select one BLE-3 to use with the widget. On the other hand, each buttons in the widget represents a different gate unlock method. It’s either ‘unlock both gates’, ‘left gate open’ or ‘right gate open’, depending on the configuration of the gate. |
| For more information on how to use i-TimeTec widget, refer here: https://www.i-timetec.com/MobileWidgets |
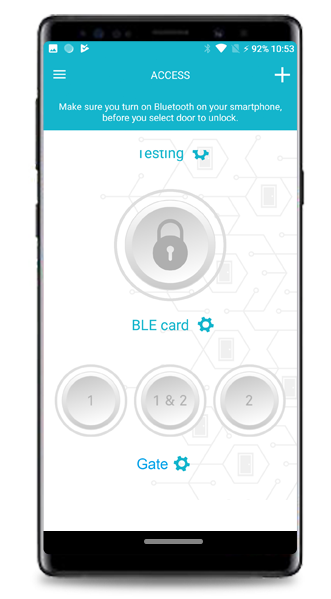
| a. Example: Access page |
 |
| b. Configuration Page for BLE-3 Widget |
| When users first launch the BLE-3 widget, this configuration page will be displayed for users to select which BLE-3 that they wish to use as a widget. Please note that users can only select one BLE-3 here. |
 |
| c. Widget added/displayed on User’s screen |
 |
| Note: If some of the screenshots or steps viewed here are different from the ones in the current system, this is due to our continuous effort to improve our system from time to time. Please notify us at info@i-neighbour.com, we will update it as soon as possible. |
© 2019 Timetec Computing Sdn. Bhd. All rights reserved.